![]()
Check that the paper edges are aligned with the left side.
![]() Check that paper in the paper tray is not being used, and then pull the tray carefully out until it stops.
Check that paper in the paper tray is not being used, and then pull the tray carefully out until it stops.
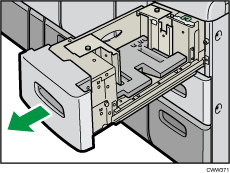
![]() Remove paper if loaded.
Remove paper if loaded.
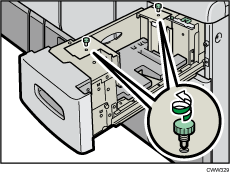
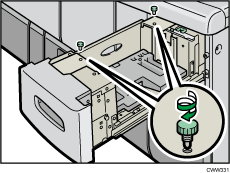
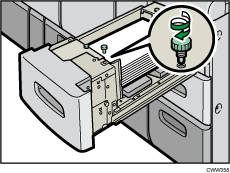
![]() Pull out the screws fixing the side fences.
Pull out the screws fixing the side fences.
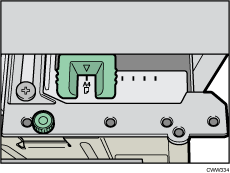
![]() Set the paper size selector in the innermost part of the tray to the new paper size.
Set the paper size selector in the innermost part of the tray to the new paper size.
![]() Set the side fences to the size you want.
Set the side fences to the size you want.
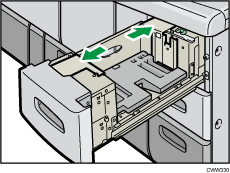
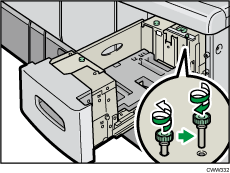
![]() Fasten the side fences with the screws.
Fasten the side fences with the screws.
![]() Set the end fence along the paper size.
Set the end fence along the paper size.
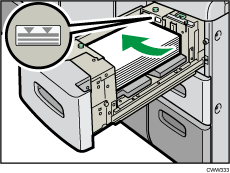
![]() Load paper into the paper tray with print side up.
Load paper into the paper tray with print side up.
Do not stack paper over the limit mark.
![]() If you load A4
If you load A4![]() or 81/2 × 11
or 81/2 × 11![]() size paper, set the end fence according to the paper size.
size paper, set the end fence according to the paper size.
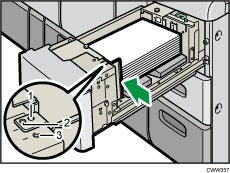
A4
81/2 × 11
Tab stock
![]() Fasten the end fence using the screw provided.
Fasten the end fence using the screw provided.
![]() Carefully slide the paper tray fully in.
Carefully slide the paper tray fully in.
![]()
As for changing paper sizes of Tray 6, contact your service representative.
After sliding the paper tray in, make sure that the paper size is changed correctly on the printer's initial screen. To display the printer's initial screen, display the [Home] screen and press the [Printer] icon.
