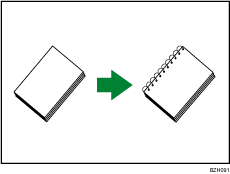
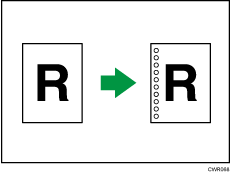
You can punch holes into copies and bound them by ring comb. You can use this function on Type 2, 3, 4, or 5 machines only.
Before using this function, select the binding and punch hole positions shown on the [Finisher] tab under [Finisher: Ring Binding Type] in [Input / Output]. For details, see "Input / Output", Preparation.
![]()
For details about paper sizes, weights, and the number of sheets that can be bound or punched, and the volume that can be output to the ring binder tray, see "Specifications for Ring Binder", Specifications.
Binding copies by ring comb
Copies are punched, and then bound by ring comb.

Original orientation and binding position
Place all the originals in the ADF in the orientation in which they can be read normally. When placing the original on the exposure glass, keep the same orientation, but set the original facing downwards.
The relationship between the orientation in which you place the original and the binding positions is as follows:
Placing the original on the exposure glass |
Placing the original in the ADF |
Binding position*1 |
|
|---|---|---|---|
Left
|
|
|
|
Top
|
|
|
|
Right
|
|
|
|
*1 The above table shows binding positioning. The orientation of the paper does not indicate direction of delivery.
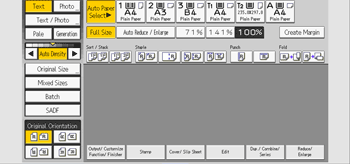
![]() Press [Output/ Customize Function/ Finisher].
Press [Output/ Customize Function/ Finisher].

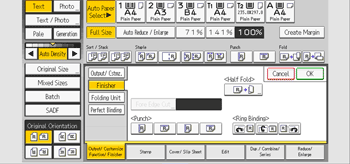
![]() Press [Finisher].
Press [Finisher].
![]() Select one of the binding positions.
Select one of the binding positions.

When you select a binding position, Sort is automatically selected.
![]() Press [OK].
Press [OK].
![]() Enter the number of copy sets using the number keys.
Enter the number of copy sets using the number keys.
![]() Specify any other copier functions that you require.
Specify any other copier functions that you require.
![]() Place the originals, and then press the [Start] key.
Place the originals, and then press the [Start] key.
Punching copies for ring binding
Use this function to punch holes into copies so that those copies can be inserted into a ring bound booklet.

Original orientation and punch hole position
Place all the originals in the ADF in the orientation in which they can be read normally. When placing the original on the exposure glass, keep the same orientation, but set the original facing downwards.
The relationship between the orientation in which you place the original and the punch hole positions is as follows:
Placing the original on the exposure glass |
Placing the original in the ADF |
Punching position*1 |
|
|---|---|---|---|
Left
|
|
|
|
Top
|
|
|
|
Right
|
|
|
|
*1 The above table shows punching positioning. The orientation of the paper does not indicate direction of delivery.
![]() Press [Output/ Customize Function/ Finisher].
Press [Output/ Customize Function/ Finisher].

![]() Press [Finisher].
Press [Finisher].
![]() Select one of the punch hole positions.
Select one of the punch hole positions.

When you select a binding position, Sort is automatically selected.
![]() Press [OK].
Press [OK].
![]() Enter the number of copy sets using the number keys.
Enter the number of copy sets using the number keys.
![]() Specify other copier functions, if necessary.
Specify other copier functions, if necessary.
![]() Place the originals, and then press the [Start] key.
Place the originals, and then press the [Start] key.


