There are three methods of registration available.
From Web Image Monitor
From Google Chrome
From a mobile device running Android
Registering from Web Image Monitor
When administrator authentication is enabled, log in to Web Image Monitor as a user with device administrator privileges to configure the settings.
![]() Start the Web browser on a computer connected to the same network as the machine, and enter "http://(IP address or host name of this machine)/ " in the address bar to access the machine.
Start the Web browser on a computer connected to the same network as the machine, and enter "http://(IP address or host name of this machine)/ " in the address bar to access the machine.
![]() Click [Login], enter the login name and password, and then click [Login].
Click [Login], enter the login name and password, and then click [Login].
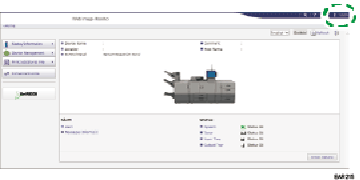
![]() Select [Device Management], and then click [Configuration].
Select [Device Management], and then click [Configuration].
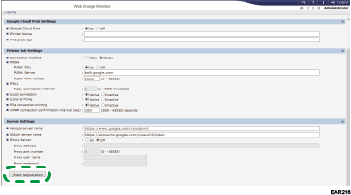
![]() Click [Google Cloud Print Settings] under Printer.
Click [Google Cloud Print Settings] under Printer.
![]() Click [Start registration].
Click [Start registration].
![]() Click the link in [GoogleURL].
Click the link in [GoogleURL].
![]() Log in to your Google account and click [Completed].
Log in to your Google account and click [Completed].
![]() Click [Logout] and close the Web browser after registration is complete.
Click [Logout] and close the Web browser after registration is complete.
Registering in Google Chrome
![]() Start Google Chrome on a computer that is connected to the same network as the machine, enter "chrome://devices" in the address bar and then press the Enter key.
Start Google Chrome on a computer that is connected to the same network as the machine, enter "chrome://devices" in the address bar and then press the Enter key.
![]() Log in to your Google account, check that the machine is displayed in "New devices", and click [Register].
Log in to your Google account, check that the machine is displayed in "New devices", and click [Register].
![]() On the Home screen, press [Printer (Classic)] icon.
On the Home screen, press [Printer (Classic)] icon.
![]() Press [Yes] on the confirmation screen.
Press [Yes] on the confirmation screen.
Registering from a smart device running Android
![]() On a mobile device that is connected to the same network as the machine, tap the [Settings] icon.
On a mobile device that is connected to the same network as the machine, tap the [Settings] icon.
![]() Tap [Printing] under [System], and then tap [Cloud Print].
Tap [Printing] under [System], and then tap [Cloud Print].
If [Printing] is not displayed, download and install the Cloud Print app from the Google Play store.
![]() Tap the option icon (
Tap the option icon (![]() ) and tap [Add the Printer].
) and tap [Add the Printer].
The screen for registering devices is displayed.
![]() Check that the machine is displayed in "New devices" and tap [Register].
Check that the machine is displayed in "New devices" and tap [Register].
When the confirmation message is displayed, tap [Yes].
![]() On the Home screen, press [Printer (Classic)] icon.
On the Home screen, press [Printer (Classic)] icon.
![]() Press [Yes] on the confirmation screen.
Press [Yes] on the confirmation screen.