Punching Holes on Printed Pages
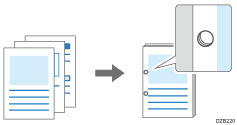
The machine can punch holes in printed sheets. You can use the holes to file the printed sheets.


The optional finisher is required to use this function.

The sizes and weights of paper that can be punched differ depending on the optional equipment attached to the machine.
The finisher punches sheets individually, so the punch hole position of each sheet is slightly different.
Specifying Punch (Windows)
Specify the settings on the [Frequently Used Settings] tab.
 Open a document to print on the computer, and display the setting screen of the printer driver from the print menu in the application.
 Specify Paper Size, Paper Type, Orientation of the document and other settings.
Basic Procedure for Printing Documents
Be sure to specify "Original Size" and "Original Orientation".
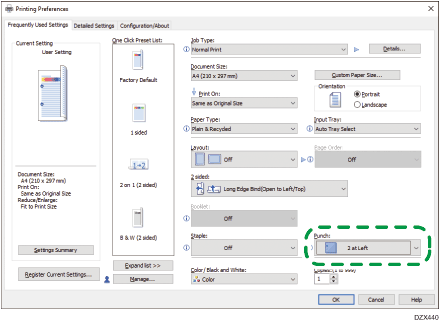
 On the [Frequently Used Settings] tab, click "Punch" and specify the punch position.

When specifying Punch together with 2-sided print or Staple, you can specify the punch position at the binding side of a printed sheet. If the specified combination of the functions cannot be performed, you cannot specify the punch position or Punch is canceled.
 After completing the configuration, click [OK] to print.
Specifying Punch (OS X/macOS)
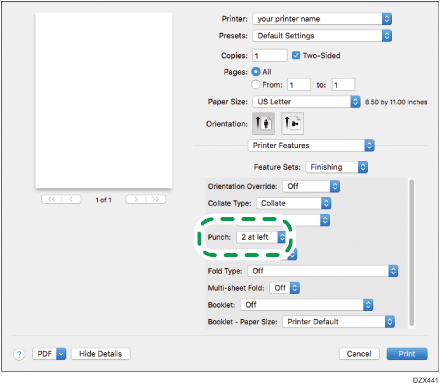
Specify the settings on [Finishing] on "Feature Sets" of [Printer Features].
 Open a document to print on the computer, and display the setting screen of the printer driver from the print menu in the application.
 Specify Paper Size, Orientation, Paper Type, and other settings.
Basic Procedure for Printing Documents
Be sure to specify "Paper Size" and "Orientation".
 On [Finishing] of "Feature Sets", click "Punch" and specify the punch position.

When specifying Punch together with 2-sided print or Staple, specify the punch position at the binding side of a printed sheet.
 After completing the configuration, click [Print] to print.
