Inserting a Chapter Page
You can insert a blank sheet or specify the print side as a chapter page using the settings in the printer driver (Designation/Chapter). You can insert a blank sheet between each page (Slip Sheet).
Function | Performance | Result |
|---|---|---|
Designation | Inserts a blank sheet before the specified page, or prints data of the specified page on the inserted sheet. | 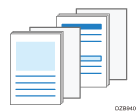 |
Chapter | Prints a chapter page always on the front side during two-sided printing. | 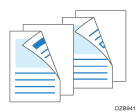 |
Slip Sheet | Inserts a slip sheet between each page to protect special paper. You can also specify to print data on the slip sheet. | 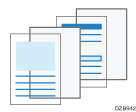 |
Specifying Designation or Chapter
Specify the settings on the [Cover/Slip/Designate] menu of the [Detailed Settings] tab.
 When inserting paper of a type that differs from the paper used for the body of the document as a designation sheet, load the paper to use for the designation in the paper tray or bypass tray.
Loading Paper into the Paper Tray
You can load the designation sheet in the same paper tray used for the body of the document.
 Open a document to print on the computer, and display the setting screen of the printer driver from the print menu in the application.
 Specify Paper Size, Paper Type, Orientation, and other settings to print the body of the document.
 Select the [Designate/Chapter] check box on the [Cover/Slip/Designate] menu of the [Detailed Settings] tab, and then click [Details...].
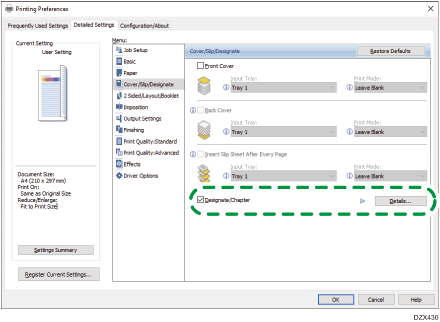
 Specify the designation or chapter.
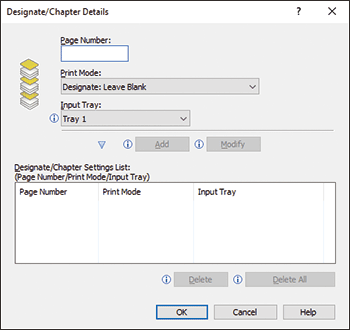
Page Number: Enter the page numbers of the first pages of sections with a comma between each number. The designation sheet is inserted before the specified page. You can specify up to 20 page numbers.
Print Mode: Specify whether to print on the designation sheet, or select Chapter. When you select to print on the designation sheet, the data of the pages specified in Page Number are printed. When you select the chapter, the data of the pages specified in Page Number are always printed on the front sides of the sheets.
Input Tray: Select the paper tray to feed the designation sheet.
 Click [OK].
 After completing the configuration, click [OK] to print.
Inserting Slip Sheets (Settings Screen Type: Standard)
Configure the settings on the [Cover/Slip/Designate] menu of the [Detailed Settings] tab.
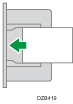
Load special paper such as transparency film into the bypass tray with the print side facing down.
Load paper to use as slip sheets into the paper tray.
Loading Paper into the Paper Tray
Load paper of the same size as the paper loaded in the bypass tray in the same orientation.
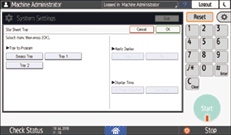
On the Home screen, press [Settings].
On the Settings screen, press [Tray/Paper Settings].
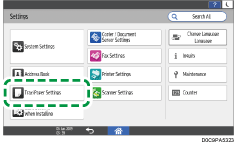
Press [Common Settings/Others]![]() [Slip Sheet Tray].
[Slip Sheet Tray].
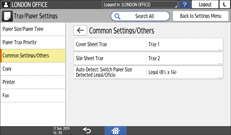
Configure the following settings on the [Slip Sheet Tray] screen.
Tray to Register: Select the tray loaded with the paper for slip sheets.
Display Time: Select [Full Time] to always use the selected paper tray to load slip sheet paper when you use the Copy function. Select [At Mode Selected] to use the selected paper tray to load slip sheet paper only when the slip sheet function is specified.
Apply Duplex: To perform 2-sided print on the slip sheets, select [Yes].
Press [OK].
After completing the configuration, press [Home]( ).
).
 Open a document to print on the computer, and display the setting screen of the printer driver from the print menu in the application.
 Specify Paper Size, Paper Type, Orientation, and other settings to print the body of the document.
 Select the [Insert Slip Sheet After Every Page] check box on the [Cover/Slip/Designate] menu of the [Detailed Settings] tab, and then specify the settings of the slip sheet.
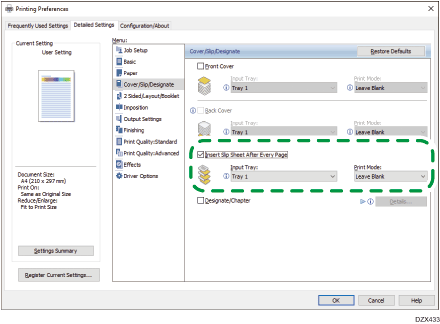
Input Tray: Select the tray loaded with the paper for the slip sheets.
Print Mode: Specify whether to print on the slip sheet. When you select [Print on Slip Sheet], the data of each page is also printed on the slip sheet.
 After completing the configuration, click [OK] to print.

When you specify Slip Sheet, Staple is canceled except for 2 sided, Book, Sort, and Center.
Inserting Slip Sheets (Settings Screen Type: Classic)
Configure the settings on the [Cover/Slip/Designate] menu of the [Detailed Settings] tab.
Load special paper such as transparency film into the bypass tray with the print side facing down.
Load paper to use as slip sheets into the paper tray.
Loading Paper into the Paper Tray
Load paper of the same size as the paper loaded in the bypass tray in the same orientation.
On the Home screen, press [Settings].
Press [Tray Paper Settings]![]() [Slip Sheet Tray] to display the slip sheet tray setting screen.
[Slip Sheet Tray] to display the slip sheet tray setting screen.
Tray to Program: Select the tray loaded with the paper for slip sheets.
Apply Duplex: To perform 2-sided print on the slip sheets, select [Yes].
Display Time: Select [Full Time] to always use the selected paper tray to load slip sheet paper when you use the Copy function. Select [At Mode Selected] to use the selected paper tray to load slip sheet paper only when the slip sheet function is specified.
After completing the configuration, press [Home]().
Open a document to print on the computer, and display the setting screen of the printer driver from the print menu in the application.
Specify Paper Size, Paper Type, Orientation, and other settings to print the body of the document.
Select the [Insert Slip Sheet After Every Page] check box on the [Cover/Slip/Designate] menu of the [Detailed Settings] tab, and then specify the settings of the slip sheet.
Input Tray: Select the tray loaded with the paper for the slip sheets.
Print Mode: Specify whether to print on the slip sheet. When you select [Print on Slip Sheet], the data of each page is also printed on the slip sheet.
After completing the configuration, click [OK] to print.
When you specify Slip Sheet, Staple is canceled except for 2 sided, Book, Sort, and Center.