Placing an Original in the Auto Document Feeder (ADF)
The ADF automatically scans multiple sheets of originals or two-sided originals at one time.
There are two types of ADF as follows:
Auto Reverse Document Feeder (ARDF)
When scanning a two-sided original, the machine scans the front side of the original first, and then turns it over to scan the back side.
One-pass duplex scanning ADF
When scanning a two-sided original, the machine scans the front and back sides of the two-sided original at one time.
For details about the sizes of originals that you can place in the ADF, see the following:
If the originals described below are placed in the ADF, it may cause misfeeds, white lines, or black lines, or result in damage to the originals. Place these originals on the exposure glass.
Stapled or clipped originals
Perforated or torn originals
Curled, folded, or creased originals
Pasted originals
Originals with adhesive tape, glue or paste stuck to them
Originals with any kind of coating, such as thermal paper, art paper, aluminum foil, carbon paper, or conductive paper
Originals with perforated lines
Originals with indexes, tags, or other projecting parts
Sticky originals such as translucent paper
Thin or highly flexible originals
Thick originals such as postcards
Bound originals such as books
Transparent originals such as transparencies or translucent paper
When loading an original written by pencil on the ADF, the original may be dirty from by being scraped.
Correct an original that tends to curl before setting on the machine.
Take care so that multiple originals do not stick to each other and are not fed at once.
Do not set an original that is wet with correcting fluid or ink. The scanning glass will be stained and the stain will be scanned with the original.
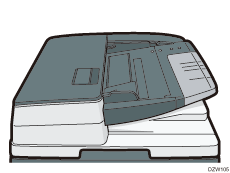
Placing Originals in the ARDF

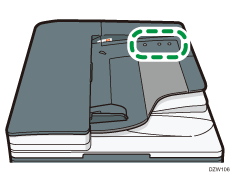
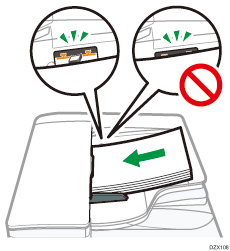
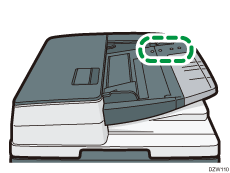
Do not block the sensors with your hand. Be sure to load the originals neatly and do not push them into the ADF forcibly. It may cause paper misfeeds or paper size error.
 Adjust the original guide to the original size.
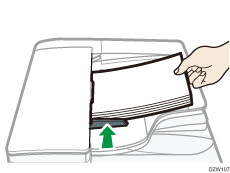
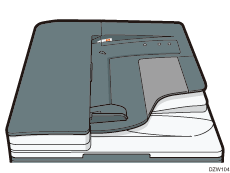
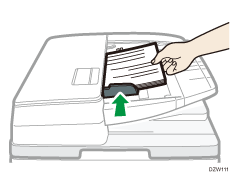
 Place the aligned originals squarely face up in the ARDF.
Place the originals with the first page facing up.
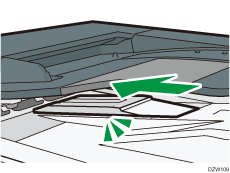
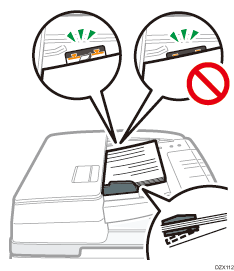
Fan sheets before loading so that multiple papers do not stick to each other and are not fed at once.
Do not stack the originals beyond the limit mark.

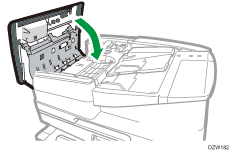
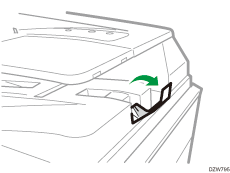
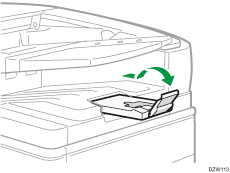
To scan originals larger than B4 or 81/2 × 14 size, raise the ADF’s extender on the ADF output tray.
When using the ARDF to scan originals with a paper weight less than 42 g/m2 (11 lb. Bond), move the slide tray on the original output tray to the left side. When the slide tray of the Auto Reversible Document Feeder (ARDF) is in the left, the amount of output paper will be low. After scanning a thin original, return the slide tray to the previous position.
Placing Originals in the One-pass Duplex Scanning ADF
Do not block the sensors with your hand. Be sure to load the originals neatly and do not push them into the ADF forcibly. It may cause paper misfeeds or paper size error.
Adjust the original guide to the original size.
Place the aligned originals squarely face up in the one-pass duplex scanning ADF.
Place the originals with the first page facing up.
Fan sheets before loading so that multiple papers do not stick to each other and are not fed at once.
Do not stack the originals beyond the limit mark.
To scan originals larger than B4 or 81/2 × 14 size, pull out the ADF’s extender on the original output tray, and then raise the stopper.
To scan originals that are smaller than A6 size, attach the small size paper unit as follows:
Open the ADF cover.
Engage the two projections of the small size paper unit with the holes on the one-pass duplex scanning ADF.
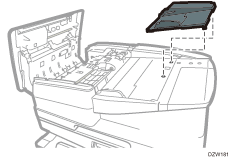
Close the ADF cover.