Adjusting and Processing Scanned Colors When Copying
You can erase a certain color in the original or adjust the color tone when copying. Use these functions to copy using less toner whose remaining amount is low or to reproduce the original color more clearly.
Erasing only a specified color (Erase Color)
Copy after erasing a certain color in the image of the original.

Replacing a Specified Color with Another (Convert Color)
For example, the blue part of the original can be replaced with orange when copying. Up to four colors can be replaced at the same time.


This function is available on machines implemented with RICOH Always Current Technology v1.2 or later.
Adjusting the color tone of the specified color (Adjust Color)
Adjusts the specific colors (yellow, red, magenta, blue, cyan, and green) by mixing them with adjacent colors in the color circle.
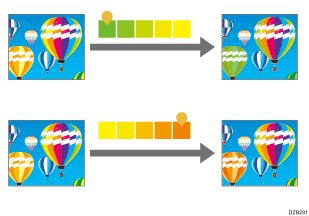
Adjusting the overall color tone (Adjust Color Balance)
When the copied result is more reddish or bluish than the original, adjust the color balance.
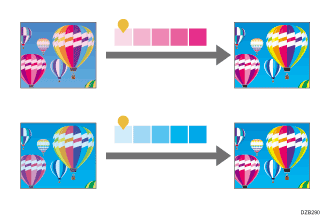
Overlaying Colors on the Entire Sheet (Color Overlay)
This function overlays a specified color on the entire output sheet.


This function is available on machines implemented with RICOH Always Current Technology v1.2 or later.
Color Overlay may change the color of the image, because the entire original will be colored.
Copying after Erasing a Specified Color
The Erase Color function is enabled when [Full Color] or [Black & White] is selected in Color Mode.
 Press [Copy] on the Home screen.
 Select [Full Color] or [Black & White] on the Copy screen.
 Press [Erase Color] on the Copy screen.

If the key is not found, select it from [Edit/Color].
 Select the color to erase, and then press [OK].
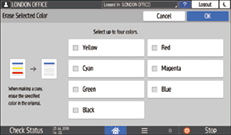
Up to four colors can be erased at the same time.
 Place the original.
 Press [Start].

You can adjust the level to identify the color to erase. Use the following item.
Settings Screen Type: Standard
[Color Sensitivity]
Settings Screen Type: Classic
[Color Sensitivity]
Copying an Original While Replacing a Specified Color with Another
Convert Color is enabled when selecting [Full Color] in Color Mode.
Register a combination of color before and after conversion.
 Press [Copy] on the Home screen.
 Select [Full Color] on the Copy screen.
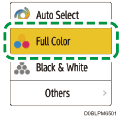
 Press [Convert Color] on the Copy screen.

If the key is not found, select it from [Edit/Color].
 Select the [Conversion 1].
 Specifying the Color and Density to Convert.
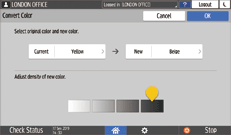
Press [Current] to specify the color to convert in the original.
Press [New] to specify the color that will be used instead of the specified color in the original.
Adjust the density of New, and then press [OK].
 To convert another color, press [Conversion 2] to [Conversion 4] to specify a combination of color and density.
 Press [OK].
 Place the original.
 Press [Start].

You can adjust the color range before conversion in five levels. Select [Wider] in Color Range. When you specify Red for example, it can be converted to a color near magenta or orange. Use the following item.
Settings Screen Type: Standard
[Color Sensitivity]
Settings Screen Type: Classic
[Color Sensitivity]
Copying by Adjusting the Color Tone of the Specified Color
The Adjust Color function is enabled when [Auto Color Select] or [Full Color] is selected in Color Mode.
 Press [Copy] on the Home screen.
 Select [Auto Color Select] or [Full Color] on the Copy screen.
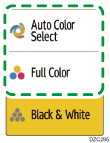
 Press [Adjust Color] on the Copy screen.

If the key is not found, select it from [Edit/Color].
 Drag
Drag ![]() of the adjusted color right or left.
of the adjusted color right or left.
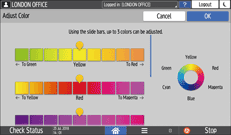
While monitoring the display on the screen, drag to adjust the color.
Up to three colors can be adjusted at the same time.
 Press [OK].
 Place the original.
 Press [Start].
Copying by Adjusting the Overall Color Tone
 Press [Copy] on the Home screen.
 Press [Adjust Color Balance] on the Copy screen.

If the key is not found, select it from [Edit/Color].
 Adjust the color balance, and then press [OK].
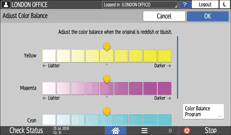
Drag ![]() of the adjusted color right or left.
of the adjusted color right or left.
Registering the color balance
After adjusting the color balance, press [Color Balance Program] to register the current adjusted value. To copy the same original again, you can use these settings.
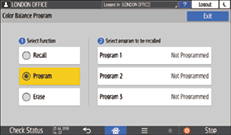
To register the color balance, select [Program], and then select the program key to register.
To recall the registered color balance, select [Recall], and then select the program key to recall.
 Place the original.
 Press [Start].
Copying While Overlaying Colors on the Entire Sheet
Color Overlay is enabled when [Full Color]/[Black & White]/[Others] is selected in Color Mode.
Specify a color and density to overlay.
 Press [Copy] on the Home screen.
 Select [Full Color], [Black & White], or [Others] on the Copy screen.
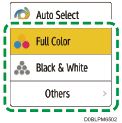
 Press [Color Overlay] on the Copy screen.

If the key is not found, select it from [Edit/Color].
 Adjust the color and density to overlay, and then press [OK].
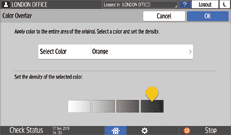
 Place the original.
 Press [Start].
