The machine automatically calculates the reproduction ratio based on the sizes of the originals and the paper you have specified. The machine will rotate, enlarge, or reduce the image of the originals to fit them to the paper.
![]()
If you select a reproduction ratio after pressing [Scale to Paper Size], [Scale to Paper Size] is canceled and the image cannot be rotated automatically.
When loading the original in the ADF, first specify the size of the original.
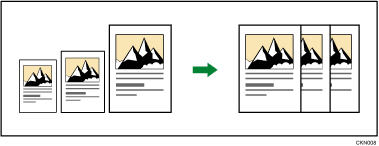
This is useful to copy different size originals to the same size paper.
If the orientation in which your original is placed is different from that of the paper you are copying onto, the machine rotates the original image by 90 degrees and fits it on the copy paper (Rotate Copy). For details about Rotate Copy, see Rotate Copy.
![]() Specify the original size.
Specify the original size.
If you select [Bypass Tray], see Copying from the Bypass Tray.
![]() Select original orientation.
Select original orientation.
For details, see Original Orientation.
![]() Press [Reduce/Enlarge].
Press [Reduce/Enlarge].
![]() Press [Scale to Paper Size].
Press [Scale to Paper Size].
![]() Select the paper tray.
Select the paper tray.
![]() When copying using the bypass tray, confirm the print side of the original and paper displayed on the screen, and then press [OK].
When copying using the bypass tray, confirm the print side of the original and paper displayed on the screen, and then press [OK].
![]() Place the originals, and then press [Start].
Place the originals, and then press [Start].
If the screen for confirming the original orientation is displayed, check the orientation, and then press [Start] again.
![]()
To copy A5 (51/2 × 81/2)
 originals onto A5 (51/2 × 81/2)
 at 100%, select the paper tray that contains A5 (51/2 × 81/2), and then select [Scale to Paper Size]. The machine rotates the original image by 90 degrees.
For details about the base point, see Reducing or Enlarging Originals.