Every paper tray is loaded in the same way.
In the following example procedure, paper is loaded into Tray 2.
![]()
 (mainly Europe and Asia)
Tray 1 can hold A4 paper only. If you want to print on A5
 , B5 JIS
 , or 81/2 × 11
 from Tray 1, contact your service representative.
 (mainly North America)
Tray 1 can hold 81/2 × 11 paper only. If you want to print on A4
 , A5
, A5 , or B5 JIS
 from Tray 1, contact your service representative.
Check the paper edges are aligned at the right side.
If a paper tray is pushed vigorously when putting it back into place, the position of the tray's side fences may slip out of place.
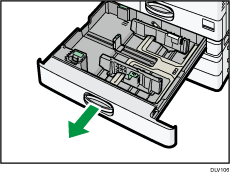
![]() Check that paper in the paper tray is not being used, and then pull the tray carefully out until it stops.
Check that paper in the paper tray is not being used, and then pull the tray carefully out until it stops.

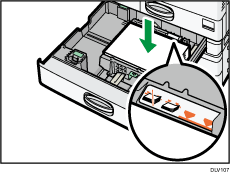
![]() Square the paper and load it print side up.
Square the paper and load it print side up.
Do not stack paper over the limit mark.

![]() Carefully push the paper tray fully in.
Carefully push the paper tray fully in.
![]()
Various sizes of paper can be loaded in Trays 2–4 by adjusting the positions of side fences and end fence. For details, see Changing the Paper Size in Trays 2–4.
You can load envelopes in Trays 2–4. When loading envelopes, place them in the correct orientation. For details, see Envelopes.
