![]()
|
Front and left view
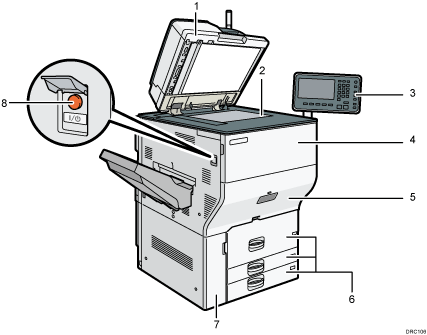
ADF
Lower the ADF over originals placed on the exposure glass.
If you load a stack of originals in the ADF, the ADF will automatically feed the originals one by one.
The ADF scans both sides of an original simultaneously.
Exposure glass
Place originals face down here.
Control panel
See Guide to the Names and Functions of the Machine's Control Panel.
Front cover
Open to change toner cartridges.
Drawer
Pull out the drawer when a paper jam occurs.
Paper trays (Trays 1–3)
Load paper here. Tray 1 is a tandem tray where paper on the left side automatically moves to the right when paper there has run out.
Lower front cover
Open to change the waste toner bottle.
Main power switch
To operate the machine, the main power switch must be on. If it is off, open the main power switch's cover and turn the switch on.
Front and right view
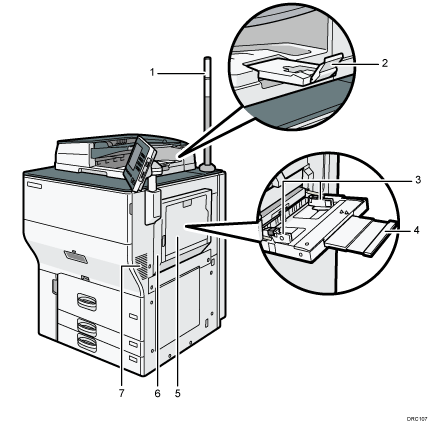
Attention light
ADF's extender
Pull this extender to support large paper.
Paper guides
When loading paper in the bypass tray, align the paper guides flush against the paper.
Extender
Pull this extender out when loading sheets larger than A4
 , 81/2 × 11 in the bypass tray.
Bypass tray
Use to copy or print on transparencies, adhesive labels, translucent paper, and paper that cannot be loaded in the paper trays.
Upper right cover
Open this cover when a paper jam occurs.
Vents
Prevent overheating.
Rear and left view
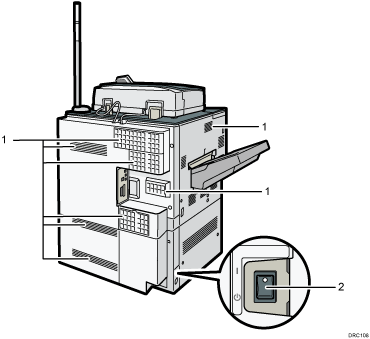
Vents
Prevent overheating.
Anti-humidity heater switch
Prevents trays from absorbing moisture. If humidity is high and temperature is low, turn this switch on to have moisture from the paper trays absorbed and prevent the print quality from deteriorating.