You can put names that have been registered in the Address Book into a group.
When registering new names, you can also register groups at the same time.
![]() Press [Home] (
Press [Home] (![]() ) at the bottom of the screen in the center.
) at the bottom of the screen in the center.
![]() Flick the screen to the left, and then press the [Address Book Management] icon.
Flick the screen to the left, and then press the [Address Book Management] icon.
![]() Check that [Program / Change] is selected.
Check that [Program / Change] is selected.
![]() Select the name to register in a group.
Select the name to register in a group.
Press the name key, or enter the registered number using the number keys.
You can search by the registered name, user code, fax number, folder name, e-mail address, or IP-Fax destination.
![]() Press [Add to Group].
Press [Add to Group].
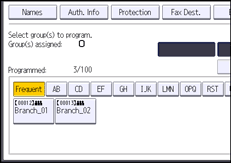
![]() Select a group to which you want to add the name.
Select a group to which you want to add the name.
You can select multiple groups.
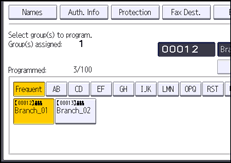
The group key that you have selected becomes highlighted, and the name is added to it.
![]() Press [OK].
Press [OK].
![]() Press [User Tools] (
Press [User Tools] (![]() ) on the top right of the screen.
) on the top right of the screen.
![]() Press [Home] (
Press [Home] (![]() ) at the bottom of the screen in the center.
) at the bottom of the screen in the center.