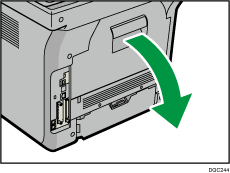
![]() Open the rear cover.
Open the rear cover.
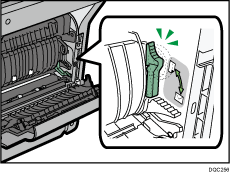
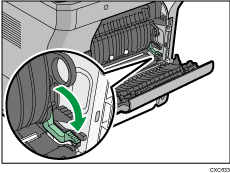
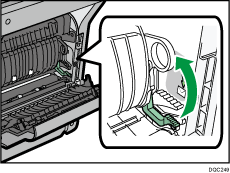
![]() Lower the envelope lever all the way down.
Lower the envelope lever all the way down.
![]() Close the rear cover.
Close the rear cover.

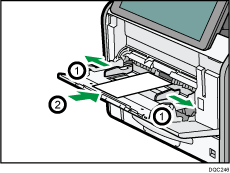
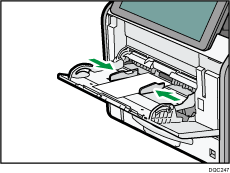
![]() While pressing and holding the button in the upper center of the bypass tray, pull the tray open.
While pressing and holding the button in the upper center of the bypass tray, pull the tray open.
![]() Fan envelopes, and then align their edges before loading.
Fan envelopes, and then align their edges before loading.
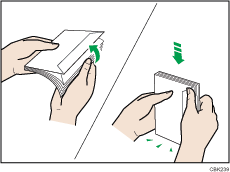
When fanning envelopes, make sure the envelope flaps are not stuck together. If they are stuck together, separate them.
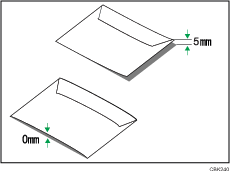
Before loading envelopes, flatten them out so that their curl does not exceed that shown in the illustration below.
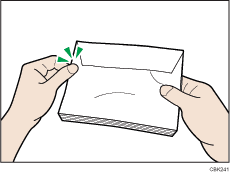
If the curl is severe, flatten out the envelopes using your fingers, as shown in the illustration below.
If envelopes are severely curled after printing, flatten them by bending them back against the curl.
![]() Set the envelope in bypass tray with the print side up.
Set the envelope in bypass tray with the print side up.
![]() Adjust both sides of the paper guide to match the envelope width.
Adjust both sides of the paper guide to match the envelope width.
![]()
Envelopes must be loaded in a specific orientation. For details, see Envelopes.
To print on envelopes that are loaded with their long edges against the printer body, rotate the print image by 180 degrees using the printer driver.
Keep the envelope lever pulled up when printing normally.
When printing on envelopes
When printing on paper other than envelopes