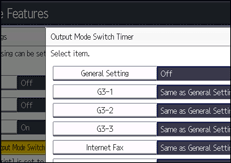
You can specify whether or not received documents are to be printed, to stand by to print, to be forwarded to a registered receiver, or to be saved on the hard disk for a specified period.
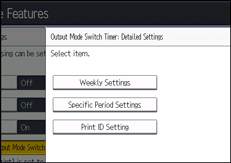
To use this function, specify the period of time to switch the output mode in [Timer: Detailed Settings], and then specify the output mode in [Output Mode] when the Output Mode Switch Timer function is enabled. You can specify [Timer: Detailed Settings] in [General Setting] and for the various communication modes.
Timer: Detailed Settings
Weekly Settings
You can register the switch time for each day of the week. A maximum of five switch times can be specified each day of the week. For details about how to register Weekly Settings, see Weekly Settings.
 (mainly Europe and Asia)
For example, you can set the machine to print fax documents if they are received from 8:00 to 19:59 on Monday, and store them on the hard disk from 20:00 on Monday.
 (mainly North America)
For example, you can set the machine to print fax documents if they are received from 8:00 AM to 7:59 PM on Monday, and store them on the hard disk from 8:00 PM on Monday.
Specific Period Settings
You can register the switch time for a specific period. A maximum of three periods can be specified. For details about how to register Specific Period Settings, see Specific Period Settings.
 (mainly Europe and Asia)
For example, you can set the machine to forward fax documents if they are received from 8:00 on 29 April to 19:59 on 5 May, and print them from 20:00 on 5 May.
 (mainly North America)
For example, you can set the machine to forward fax documents if they are received from 8:00 AM on April 29 to 7:59 PM on May 5, and print them from 8:00 PM on May 5.
Print ID Setting
You can register the print ID. If [ID Required Print] is set to on in [Output Mode Switch Timer], received documents are stored in the memory and are not automatically printed. To print the documents, enter the ID that is specified in [Print ID Setting]. IDs can be specified for [General Setting] or each line.
You cannot register duplicate IDs.
When a print ID is entered, it is compared to IDs registered in [Print ID Setting]. If a match is found, the document whose ID is specified is printed.
Selecting [Same as General Setting] in the [Output Mode Switch Timer] screen sets the same ID registered for [General Setting] in [Output Mode Switch Timer].
Output Mode
Specify the output mode for receiving fax documents for the period of time that is registered in [Weekly Settings] or [Specific Period Settings].
Not Set
Print
Standby to Print
ID Required Print
Forwarding
Store
If [Standby to Print] or [ID Required Print] is selected, all received documents are stored in memory and are not automatically printed.
To print documents if [Standby to Print] is selected, press [Print Standby to Print Files] in [Reception File Settings]. You can print documents from the various incoming communication modes.
To print documents if [ID Required Print] is selected, press [Print ID Required Print Files] in [TX/RX Status / Print]. You can print documents from the various incoming communication modes. For details, see Printing ID Required Print Files.
![]() Press [Output Mode Switch Timer].
Press [Output Mode Switch Timer].
![]() Select [General Setting] or the line you want to specify.
Select [General Setting] or the line you want to specify.

![]() Press [On].
Press [On].
![]() Press [Timer: Detailed Settings].
Press [Timer: Detailed Settings].
![]() Configure the settings for [Weekly Settings], [Specific Period Settings], and [Print ID Setting], as necessary.
Configure the settings for [Weekly Settings], [Specific Period Settings], and [Print ID Setting], as necessary.

For details about how to register Weekly Settings, see Weekly Settings.
For details about how to register Specific Period Settings, see Specific Period Settings.
To register a Print ID, press [Print ID Setting]. Enter an ID number with number keys. Press [![]() ], and then press [OK].
], and then press [OK].
![]() Press [Exit].
Press [Exit].
![]() Press [OK].
Press [OK].
![]() Press [Exit].
Press [Exit].
