This section explains how to specify the size for a custom size roll of paper from the control panel when using RP-GL/2 or RTIFF as a printer language.
For details about how to change the printer language, see "Specifying a Printer Language", RP-GL/2 and RTIFF.
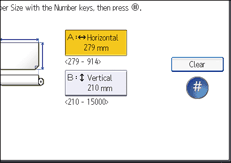
Paper sizes that can be specified are 279–914 mm (11.0–36.0 inches) horizontally and 210–15000 mm (8.3–590.5 inches) vertically.
When using RTIFF as a printer language, the machine can detect the size of a custom size roll of paper by default.
![]() Press [Home] (
Press [Home] (![]() ) at the bottom of the screen in the center.
) at the bottom of the screen in the center.
![]() Flick the screen to the left, and then press the [User Tools] icon (
Flick the screen to the left, and then press the [User Tools] icon (![]() ).
).
![]() Press [Machine Features].
Press [Machine Features].
![]() Press [Printer Features].
Press [Printer Features].
![]() Press [System(EM)].
Press [System(EM)].
![]() Select [Custom Size: Paper Input Location 1] or [Custom Size: Paper Input Location 2].
Select [Custom Size: Paper Input Location 1] or [Custom Size: Paper Input Location 2].
![]() Enter the horizontal size of the paper using the number keys, and then press [
Enter the horizontal size of the paper using the number keys, and then press [![]() ].
].

![]() Enter the vertical size of the paper using the number keys, and then press [
Enter the vertical size of the paper using the number keys, and then press [![]() ].
].
![]() Press [OK].
Press [OK].
![]() Press [User Tools] (
Press [User Tools] (![]() ) on the top right of the screen.
) on the top right of the screen.
![]() Press [Home] (
Press [Home] (![]() ) at the bottom of the screen in the center.
) at the bottom of the screen in the center.
