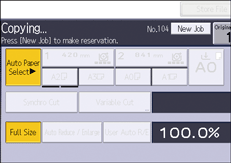
You can make settings for the next copy job during copying.
You can preset up to eight jobs each for the Copy function and the Document Server function. When the current copy job is finished, the next job will start automatically.
![]() Press [New Job] when “Copying...” appears.
Press [New Job] when “Copying...” appears.

![]() Be sure message “Ready” appears, and then make settings for the next copy job.
Be sure message “Ready” appears, and then make settings for the next copy job.
![]() Place the originals.
Place the originals.
The original feeds automatically into the machine and is then scanned.
When the preset job is complete, a job preset confirmation dialog box appears.
![]() Press [Exit].
Press [Exit].
After the current copy job, the next copy job starts automatically.
![]()
If you are printing a document from the Document Server, you can only preset jobs with functions that are already embedded in the document. For example, if you print a document that is embedded with the printer function, you cannot preset jobs with the copy function.
You can switch the screen to the current copy job by pressing [To Copying Screen]. You can switch the screen to the preset job by pressing [To Reserv. Screen].
Preset copy jobs are registered under job numbers in the reservation screen.
You can confirm and delete preset jobs. For details about the procedures, see "Managing Jobs", Convenient Functions.
You might not be able to specify eight preset jobs if your originals are large.
