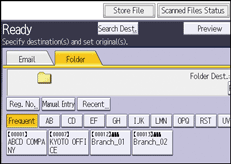
![]() Press [Store File].
Press [Store File].

![]() Make sure that [Store to HDD + Send] is selected.
Make sure that [Store to HDD + Send] is selected.
![]() If necessary, specify the stored file's information, such as [User Name], [File Name], [Password], and [Select Folder].
If necessary, specify the stored file's information, such as [User Name], [File Name], [Password], and [Select Folder].
User Name
Press [User Name], and then select a user name. To specify an unregistered user name, press [Manual Entry], and then enter the name. After specifying a user name, press [OK].
File Name
Press [File Name], enter a file name, and then press [OK].
Password
Press [Password], enter a password, and then press [OK]. Re-enter the password for confirmation, and then press [OK].
Select Folder
Specify the folder in which to save the stored files.
![]() Press [OK].
Press [OK].
![]() Specify the setting for sending the file by Scan to Folder, and then send the file.
Specify the setting for sending the file by Scan to Folder, and then send the file.
For details about sending a file by Scan to Folder, see Basic Procedure When Using Scan to Folder.
![]() Place the originals.
Place the originals.
If scanning does not start automatically, press the [Start] key.
![]()
You can resend stored files by Scan to Folder. To resend stored files, select the files on the Select Stored File screen, and then send them. For details, see Sending a Stored File.
When the specified destination is updated using the central address book management function, the spooled documents are sent to the destination after updating.
For details about central address book management, see "Administrator Tools", Connecting the Machine/ System Settings.
