![]() Check the contents of the package.
Check the contents of the package.
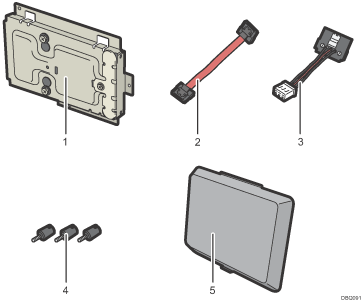
Hard disk
Flat cable
Power cord
Screws (3)
Memory cover
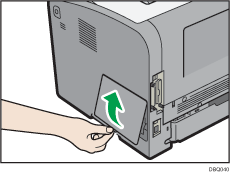
![]() Remove the memory cover.
Remove the memory cover.
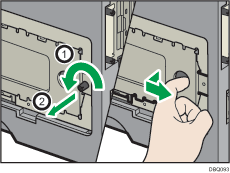
![]() Loosen the screw by using a coin, and then remove the inner cover.
Loosen the screw by using a coin, and then remove the inner cover.
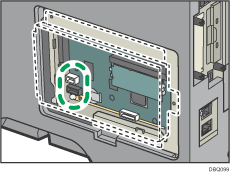
![]() Install the hard disk in the indicated position.
Install the hard disk in the indicated position.
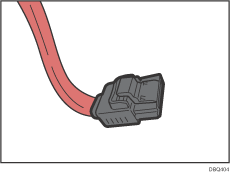
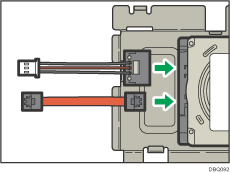
![]() Connect the flat cable and power cord to the hard disk.
Connect the flat cable and power cord to the hard disk.
Bent the flat cable as shown in the illustration below, and then connect it to the hard disk.
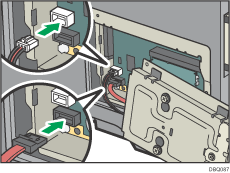
![]() Connect the flat cable and power cord to the board of the printer.
Connect the flat cable and power cord to the board of the printer.
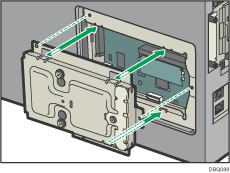
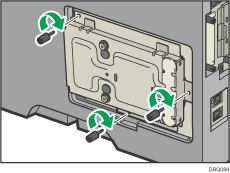
![]() Align the upper and lower protrusions on the hard disk into the notches on the printer, and then fasten the hard disk to the printer with the three screws.
Align the upper and lower protrusions on the hard disk into the notches on the printer, and then fasten the hard disk to the printer with the three screws.
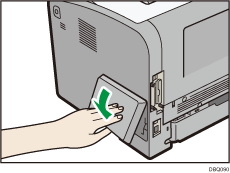
![]() Attach the memory cover.
Attach the memory cover.
![]() Plug in the power cord, and then turn on the printer.
Plug in the power cord, and then turn on the printer.
![]() Print the configuration page to confirm the installation.
Print the configuration page to confirm the installation.
![]()
Check that the hard disk was correctly installed by printing the configuration page. If it is correctly installed, "Hard Disk" will appear for "Device Connection" on the configuration page. For details about printing the configuration page, see Test Printing.
If the hard disk was not installed properly, repeat the procedure from the beginning. If it cannot be installed correctly even after trying the installation a second time, contact your sales or service representative.
To use the installed hard disk, configure the printer options in "Accessories" in the printer driver. For information about opening "Accessories", see "Configuring Option Settings for the Printer", Driver Installation Guide.