The printer comes equipped with 512 MB of memory. This can be expanded to a maximum of 1.0 GB.
![]() Turn the printer off and unplug the power cord.
Turn the printer off and unplug the power cord.
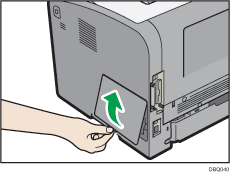
![]() Remove the memory cover.
Remove the memory cover.
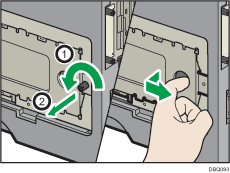
![]() Loosen the screw by using a coin, and then remove the inner cover.
Loosen the screw by using a coin, and then remove the inner cover.
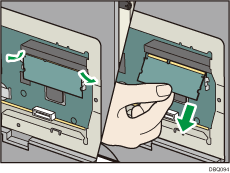
![]() Push the levers on both ends of the slot outward, and then remove the default module.
Push the levers on both ends of the slot outward, and then remove the default module.
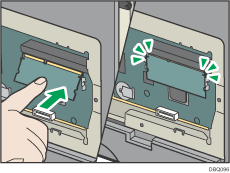
![]() To install the recommended memory, align the notch of the recommended memory with the protruding part of the vacant slot, and then carefully insert the module at an angle.
To install the recommended memory, align the notch of the recommended memory with the protruding part of the vacant slot, and then carefully insert the module at an angle.
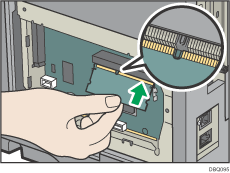
![]() Keeping the module at an angle, press it down until it clicks into place.
Keeping the module at an angle, press it down until it clicks into place.
![]() If you are also installing the hard disk, install it before returning the inner cover to the printer.
If you are also installing the hard disk, install it before returning the inner cover to the printer.
For instructions about installing the hard disk, see Installing the hard disk.
![]() Insert the two left protrusions of the inner cover, and then align the screw holes of the inner cover with the printer.
Insert the two left protrusions of the inner cover, and then align the screw holes of the inner cover with the printer.
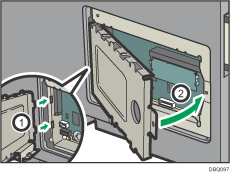
![]() Tighten the screw.
Tighten the screw.
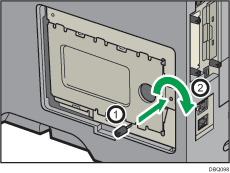
![]() Attach the memory cover.
Attach the memory cover.
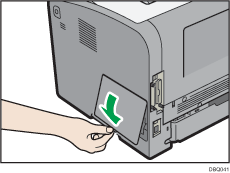
![]() Plug in the power cord, and then turn on the printer.
Plug in the power cord, and then turn on the printer.
![]() Print the configuration page to confirm the installation.
Print the configuration page to confirm the installation.
![]()
Check that the SDRAM module was correctly installed by printing the configuration page. Check that the total memory value is shown in "Total Memory" on the configuration page. For details about printing the configuration page, see Test Printing.
If the SDRAM module was not installed properly, repeat the procedure from the beginning. If it cannot be installed correctly even after trying the installation a second time, contact your sales or service representative.
To use the installed SDRAM module, configure the printer options in "Accessories" in the printer driver. For details about opening "Accessories", see "Configuring Option Settings for the Printer", Driver Installation Guide.
