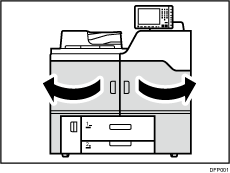
![]() Open the front covers.
Open the front covers.
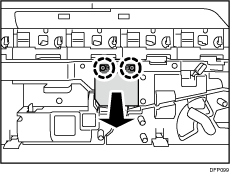
![]() Remove the 2 screws, and then remove the cover.
Remove the 2 screws, and then remove the cover.
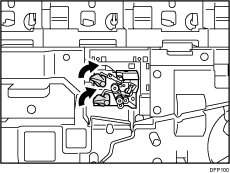
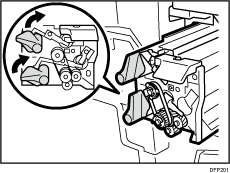
![]() Pull up the 2 levers.
Pull up the 2 levers.
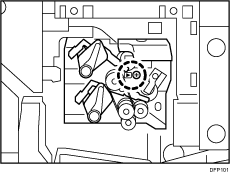
![]() Remove the screw.
Remove the screw.
![]() Holding the grip, pull out the ITB cleaning unit until it stops.
Holding the grip, pull out the ITB cleaning unit until it stops.
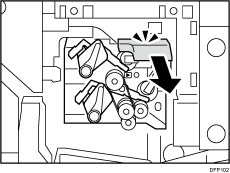
![]() While holding the latch, remove the ITB cleaning unit.
While holding the latch, remove the ITB cleaning unit.
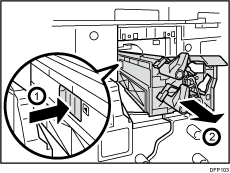
Steps 7 to 11 describe the procedure for cleaning the stained fuser unit by removing the ITB cleaning unit.
![]() Pull down the lever of the fuser unit.
Pull down the lever of the fuser unit.
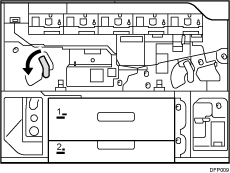
![]() Pull the drawer out completely until it stops.
Pull the drawer out completely until it stops.
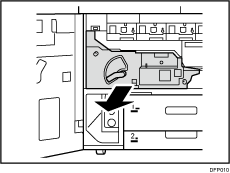
![]() Use a dry cloth to clean the transport belt unit. To clean the sensor, use a blower brush.
Use a dry cloth to clean the transport belt unit. To clean the sensor, use a blower brush.
Be careful to avoid the paper transport belt sensor when you do this.
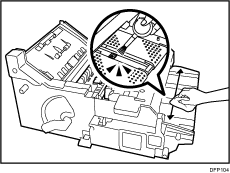
![]() Push the drawer slowly into the machine until it stops.
Push the drawer slowly into the machine until it stops.
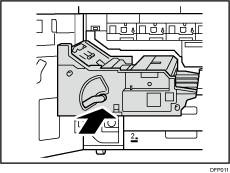
![]() Pull the lever up.
Pull the lever up.
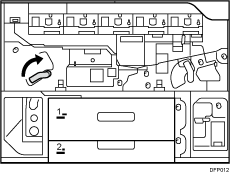
![]() Engage the new cleaning unit for intermediate transfer belt with the guide rail.
Engage the new cleaning unit for intermediate transfer belt with the guide rail.
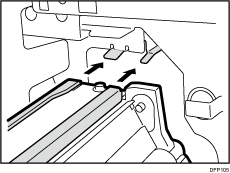
Leave the lever in the up position.
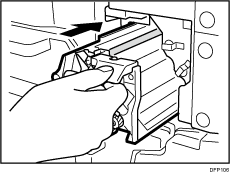
![]() Push in the cleaning unit for intermediate transfer belt.
Push in the cleaning unit for intermediate transfer belt.
![]() Check the positions of the metal plates.
Check the positions of the metal plates.
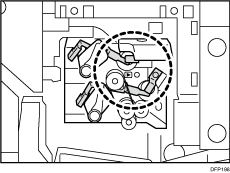
Reset in the following situations.
The metal plates overlap each other
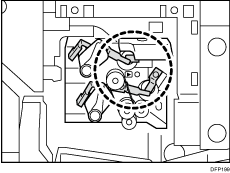
The metal plates touch slightly
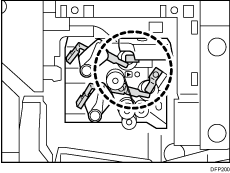
![]() Reattach the screw.
Reattach the screw.
Do not touch the levers and do not reattach the cover yet.
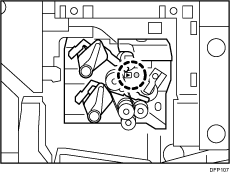
In Steps 16 to 20, temporarily remove the paper transfer unit in order to perform ITB manual lubrication.
![]() Pull down the lever of the paper transfer unit.
Pull down the lever of the paper transfer unit.
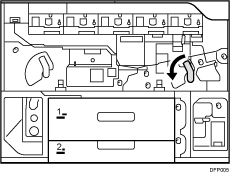
![]() Pull out the drawer until it stops.
Pull out the drawer until it stops.
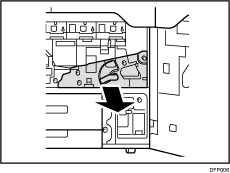
![]() Remove the 2 screws.
Remove the 2 screws.
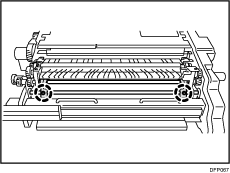
![]() Push both arm supports toward the center until they stop.
Push both arm supports toward the center until they stop.
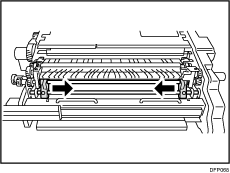
![]() Rotate the paper transfer unit, and then remove it.
Rotate the paper transfer unit, and then remove it.
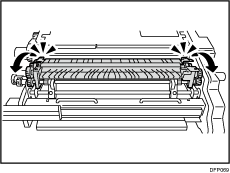
![]() Push the drawer back into the machine with the paper transfer unit detached.
Push the drawer back into the machine with the paper transfer unit detached.
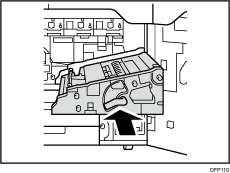
![]() Pull the lever up.
Pull the lever up.
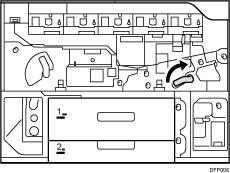
![]() Close the front covers.
Close the front covers.
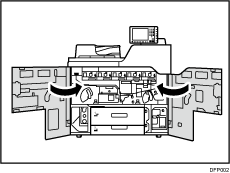
![]() Reset the counter for replaceable parts.
Reset the counter for replaceable parts.
![]() Access the Adjustment Settings for Skilled Operators menu.
Access the Adjustment Settings for Skilled Operators menu.
See "Adjustment Settings for Skilled Operators", Adjustment Item Menu Guide: TCRU/ORU.
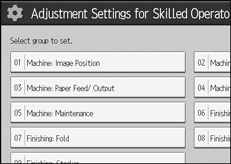
![]() Press [Machine: Maintenance].
Press [Machine: Maintenance].
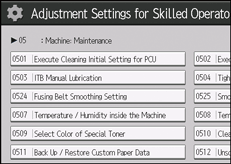
![]() Press [ITB Manual Lubrication].
Press [ITB Manual Lubrication].
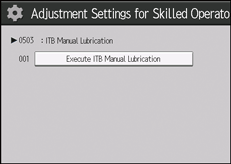
![]() Press [Execute ITB Manual Lubrication].
Press [Execute ITB Manual Lubrication].
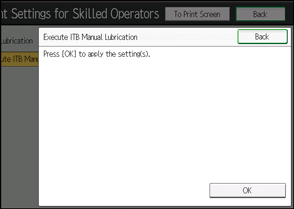
![]() Press [OK].
Press [OK].
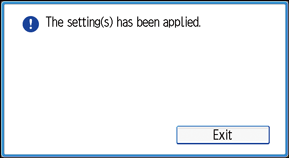
Wait for the operation to finish.
This operation takes about five minutes during which time a message appears on the control panel.
![]() Press [Exit].
Press [Exit].
![]() Open the front covers.
Open the front covers.

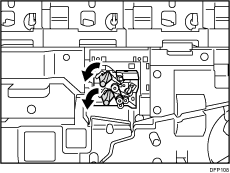
![]() Pull down the 2 levers.
Pull down the 2 levers.
![]() Attach the cover, and then secure it with the 2 screws.
Attach the cover, and then secure it with the 2 screws.
![]() Turn the machine off.
Turn the machine off.
![]() Lower the lever.
Lower the lever.

![]() Pull out the drawer until it stops.
Pull out the drawer until it stops.

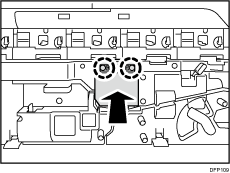
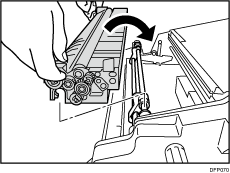
![]() Attach the paper transfer unit by engaging the notches on its sides with the shaft.
Attach the paper transfer unit by engaging the notches on its sides with the shaft.
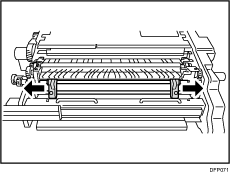
![]() Push both support arms outwards until they stop.
Push both support arms outwards until they stop.
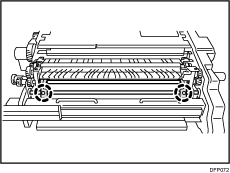
![]() Reattach the 2 screws.
Reattach the 2 screws.
![]() Push the drawer back into the machine.
Push the drawer back into the machine.
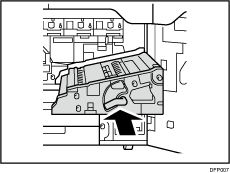
![]() Pull the lever up.
Pull the lever up.

![]() Close the front covers.
Close the front covers.

