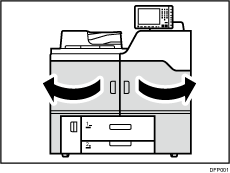
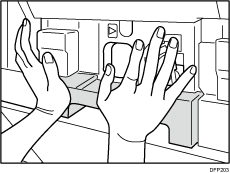
![]() Open the front covers.
Open the front covers.
If you are replacing the units for yellow or magenta, proceed to Step 4.
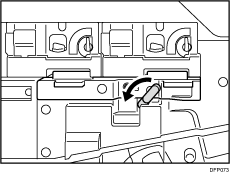
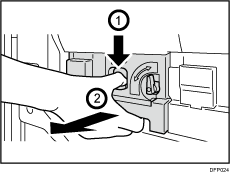
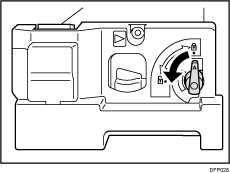
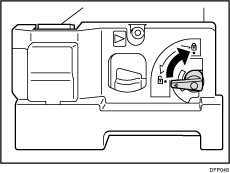
![]() Pull down the lever.
Pull down the lever.
![]() Remove the screw, and then remove the cover.
Remove the screw, and then remove the cover.
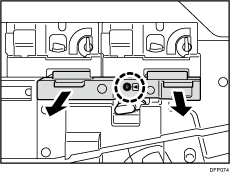
![]() Remove the screw.
Remove the screw.
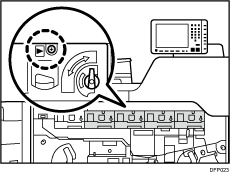
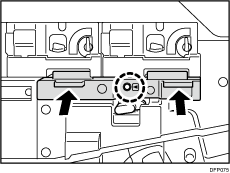
![]() Push down on the lock lever and pull the PCDU out until it stops.
Push down on the lock lever and pull the PCDU out until it stops.
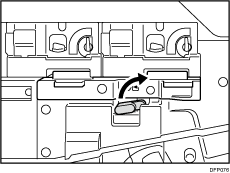
![]() Push the lever to the rear to release it, and then pull it up.
Push the lever to the rear to release it, and then pull it up.
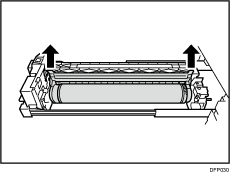
![]() Remove the charger unit.
Remove the charger unit.
If you are replacing the charger unit only, proceed to Step 17.
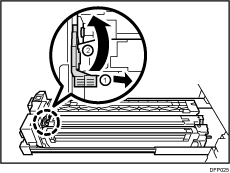
![]() Rotate the handle.
Rotate the handle.
![]() Turn the lock lever down to unlock the PCU cleaning unit.
Turn the lock lever down to unlock the PCU cleaning unit.
![]() Remove the PDU cleaning unit.
Remove the PDU cleaning unit.

If you are replacing the PCU cleaning unit only, proceed to Step 13.
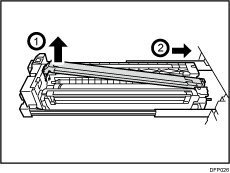
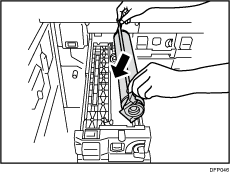
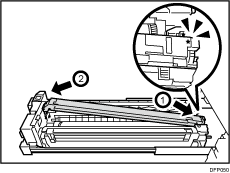
![]() Pull out the photoconductor unit.
Pull out the photoconductor unit.
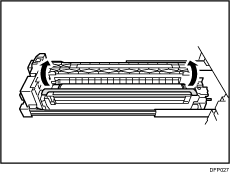
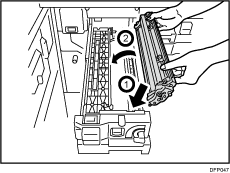
![]() Attach the new photoconductor unit.
Attach the new photoconductor unit.
Check whether powder has been applied to the photoconductor drum surface. The customer engineer applies the powder.
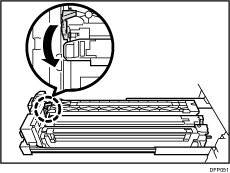
![]() If the photoconductor unit is not new, hold its flange and rotate it toward yourself by 30 degrees.
If the photoconductor unit is not new, hold its flange and rotate it toward yourself by 30 degrees.

![]() Attach the new PCU cleaning unit.
Attach the new PCU cleaning unit.
![]() Pull up the lock lever to lock the PCU cleaning unit.
Pull up the lock lever to lock the PCU cleaning unit.
![]() Rotate the handle.
Rotate the handle.

![]() Attach the charger unit.
Attach the charger unit.
![]() Pull down the charger unit lock lever to the locked position.
Pull down the charger unit lock lever to the locked position.
![]() Push the PCDU into the machine.
Push the PCDU into the machine.
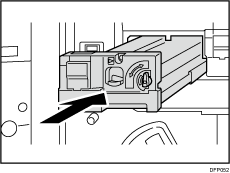
Push it in slowly until it clicks.
Do not push the upper or center part of the PCDU.
![]() Secure the PCDU with the screw.
Secure the PCDU with the screw.

If you replaced the units for yellow or magenta, proceed to Step 23.
![]() Attach the cover, and then secure it with the screw.
Attach the cover, and then secure it with the screw.
![]() Pull the lever up.
Pull the lever up.
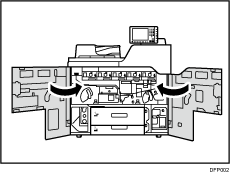
![]() Close the front covers.
Close the front covers.
![]() Reset the counter for replaceable parts.
Reset the counter for replaceable parts.