When you specify the lengths of the template after measuring them, the values to adjust the image position are automatically calculated and applied.
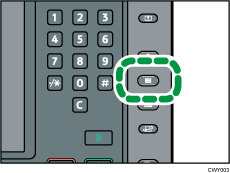
![]() Press the [Paper Setting] key.
Press the [Paper Setting] key.

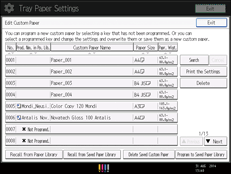
![]() Press [Edit Custom Paper].
Press [Edit Custom Paper].
![]() Select the name of the paper that you want to register.
Select the name of the paper that you want to register.
Press [![]() Previous] or [
Previous] or [![]() Next] to scroll through the list to find the paper that you want to select.
Next] to scroll through the list to find the paper that you want to select.

![]() Press [
Press [![]() Next].
Next].
![]() Press [Change] for [Advanced Settings].
Press [Change] for [Advanced Settings].
![]() Enter the login user name and password of the administrator if an authentication screen appears.
Enter the login user name and password of the administrator if an authentication screen appears.
The authentication screen does not appear if you log in as an administrator.
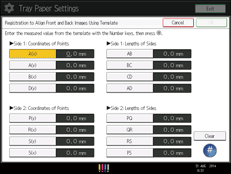
![]() Press [Registration to Align Front and Back Images Using Template].
Press [Registration to Align Front and Back Images Using Template].
![]() Enter the value you wrote on the printed template.
Enter the value you wrote on the printed template.
Select the item you want to enter and use the numeric keypad to enter the value.
You can enter values from 0.1 to 999.9 mm in 0.1-mm increments.

![]() Press [OK].
Press [OK].
![]() Press [Exit].
Press [Exit].
![]() Press [OK].
Press [OK].
![]() Press [Overwrite].
Press [Overwrite].
![]() Press [Yes].
Press [Yes].
![]() Press [Exit].
Press [Exit].
![]() Press the [Paper Setting] key.
Press the [Paper Setting] key.
You can also close the [Tray Paper Settings] screen by pressing [Exit].
![]()
For details about how to register a custom paper, see Registering a Custom Paper.
