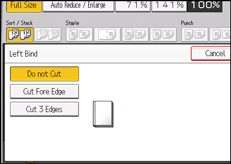
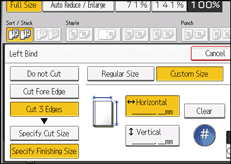
Specify the size of the finished bound booklets and cut three edges to a custom size.
![]() Press [Cut 3 Edges].
Press [Cut 3 Edges].

![]() Press [Specify Finishing Size].
Press [Specify Finishing Size].
![]() Press [Custom Size].
Press [Custom Size].
![]() Enter the horizontal size with the number keys, and then press [
Enter the horizontal size with the number keys, and then press [![]() ].
].

![]() Enter the vertical size with the number keys, and then press [
Enter the vertical size with the number keys, and then press [![]() ].
].
![]() To adjust the cut position, press [Cut Position Fine Adj.].
To adjust the cut position, press [Cut Position Fine Adj.].
![]() Press [
Press [![]() ] and [
] and [![]() ] to set the top or bottom cut position, and then press [OK].
] to set the top or bottom cut position, and then press [OK].
![]()
You can shift the horizontal cut position from 139.7 to 216.0 mm (5.50 to 8.50 inches) in 0.1 mm (0.01 inches) increments.
You can shift the vertical cut position from 201.0 to 297.0 mm (7.92 to 11.69 inches) in 0.1 mm (0.01 inches) increments.
You can shift the cut position from -22.0 to 22.0 mm (-0.86 to 0.86 inches) in 0.1 mm (0.01 inches) increments.
For details about how to perfect bind, see Perfect Binding.
