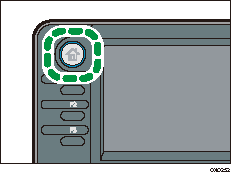
![]() Press the [Home] key on the top left of the control panel, and press the [Scanner] icon on the [Home] screen.
Press the [Home] key on the top left of the control panel, and press the [Scanner] icon on the [Home] screen.

![]() Make sure that no previous settings remain.
Make sure that no previous settings remain.
If a previous setting remains, press the [Reset] key.
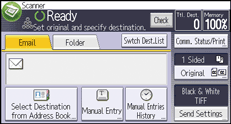
![]() Press the [Email] tab.
Press the [Email] tab.

![]() Place originals.
Place originals.
![]() If necessary, select [Send Settings] or [Original], and specify scan settings according to the original you want to scan.
If necessary, select [Send Settings] or [Original], and specify scan settings according to the original you want to scan.
Example: Scanning the document in color/duplex mode, and saving as a PDF file.
Press [Original], and then press [2 Sided].
Press [Send Settings]. Select [Type of Original], and then press [Full Color].
Press [Send Settings]. Select [File Type], and then press [PDF].
For information about other settings, see Various Scan Settings![]() .
.
The settings explained in Entering an E-mail Message![]() , Entering an E-mail Subject
, Entering an E-mail Subject![]() , Security Settings for E-mails
, Security Settings for E-mails![]() can also be specified.
can also be specified.
![]() Specify the destination.
Specify the destination.
You can specify multiple destinations.
For details, see Specifying a Destination or Recipient![]() .
.
![]() Press [
Press [![]() ] in [Send Settings] twice, select [Sender Name], and then specify the e-mail sender (originator).
] in [Send Settings] twice, select [Sender Name], and then specify the e-mail sender (originator).
For details, see Specifying an E-mail Sender![]() .
.
![]() To use the Message Disposition Notification function, select [Send Settings], press [
To use the Message Disposition Notification function, select [Send Settings], press [![]() ] four times, and then press [Reception Notice].
] four times, and then press [Reception Notice].
If you select [Reception Notice], the selected e-mail sender will receive e-mail notification when the e-mail recipient has opened the e-mail.
![]() Press the [Start] key.
Press the [Start] key.
![]()
This machine supports SMTPS (SMTP over SSL).
This machine supports Web mail sending.
In [System Settings], you can specify the administrator's e-mail address as the default sender name. This lets you send e-mail without entering anything for [Sender Name]. For detail, see "File Transfer", Connecting the Machine/ System Settings.
Depending on the security setting, the logged-in user may be specified as [Sender Name].
To use Message Disposition Notification, log in to the machine as a user and specify the sender. Note, however, that the [Reception Notice] notification e-mail may not be transmitted if the e-mail software of the recipient does not support Message Disposition Notification.
If you press [Preview] in [System Settings] and then start scanning while [Preview] is selected, the Preview screen appears. You can use this screen to check how the originals are scanned and the scan setting used for scanning. After checking the preview, you can specify whether to send the file or not. For detail, see "How to Use the Screens on the Control Panel", Getting Started.
To cancel scanning, press the [Stop] key. Check the information displayed in the dialog box, and then press any button.
You can also store a scan file and simultaneously send it by e-mail. For details, see Simultaneous Storage and Sending by E-mail
 .
.After an e-mail is sent, the destination, sender, subject, text, and file name fields will be automatically cleared. If you want to preserve the information in these fields, contact your local dealer.
You cannot switch the screen while e-mail or other destinations are being specified. To clear the specified destination, display the destination in the destination field of each screen, and then press the [Clear] key.
