![]()
Before performing this procedure, see Preparation for Sending by Scan to Folder and confirm the details of the destination computer. See also "Registering Folders", Connecting the Machine/ System Settings, and register the address of the destination computer to the address book.
![]() Display the initial scanner screen.
Display the initial scanner screen.
When using the standard operation panel
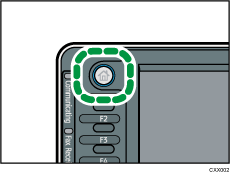
Press the [Home] key on the top left of the control panel, and press the [Scanner] icon on the [Home] screen.

When using the Smart Operation Panel
Press the [Home] key on the top left of the control panel. Flick the screen to the left, and then press the [Scanner] icon on the Home screen 4.
![]() Make sure that no previous settings remain.
Make sure that no previous settings remain.
If a previous setting remains, press the [Reset] key.
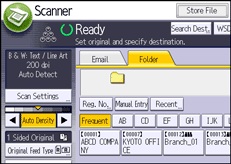
![]() Press the [Folder] tab.
Press the [Folder] tab.

![]() Place originals.
Place originals.
![]() If necessary, specify the scan settings according to the original to be scanned.
If necessary, specify the scan settings according to the original to be scanned.

Example: Scanning the document in color/duplex mode, and saving as a PDF file.
Press [Scan Settings], and then press [Full Color: Text / Photo] in the [Original Type] tab.
Press [Original Feed Type], and then press [2 Sided Original].
Press [PDF] under [Send File Type / Name].
For information about other settings, see Various Scan Settings.
![]() Specify the destination.
Specify the destination.
You can specify multiple destinations.
For details, see Specifying Scan to Folder Destinations.
![]() Press the [Start] key.
Press the [Start] key.
![]()
If any of the machine's security functions are enabled, select the destination from the registered folder only when you send files by Scan to Folder.
If you have selected more than one destination, you can press [
 ] or [
 ] next to the destination field to scroll through the destinations.
To cancel a selected destination, press [
 ] or [
 ] to display the destination in the destination field, and then press the [Clear] key. You can cancel a destination selected from the destination list by pressing the selected destination again.
To cancel scanning, press the [Stop] key. Check the information displayed in the dialog box, and then press any button.
You can also store a file and simultaneously send it by Scan to Folder. For details, see Simultaneous Storage and Sending by Scan to Folder.
After scan files are sent, the destination and file name fields will be automatically cleared. If you want to preserve the information in these fields, contact your local dealer.
You cannot switch the screen while WSD or DSM destinations are being specified. To clear the specified destination, display the destination in the destination field of each screen, and then press the [Clear] key.
