The Document Server enables you to store documents being read with the copy feature on the hard disk of this machine. Thus you can print them later applying necessary conditions.
You can check the stored documents from the Document Server screen. For details about the Document Server, see Storing Data![]() .
.
Depending on which options are installed on your machine, this function might not be available. For details, see "Functions Requiring Optional Configurations", Getting Started.
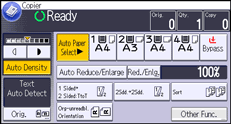
![]() Press [Other Func.].
Press [Other Func.].

![]() Press [
Press [![]() ].
].
![]() Press [Store File].
Press [Store File].
![]() Enter a file name, user name, or password if necessary.
Enter a file name, user name, or password if necessary.
![]() Press [OK] twice.
Press [OK] twice.
![]() Place the originals.
Place the originals.
![]() Make the scanning settings for the original.
Make the scanning settings for the original.
![]() Press the [Start] key.
Press the [Start] key.
Stores scanned originals in memory and makes one set of copies. If you want to store another document, do so after copying is complete.
![]()
To stop scanning, press the [Stop] key. To resume a paused scanning job, press [Continue] in the confirmation screen. To delete scanned images and cancel the job, press [Stop]. The originals placed in the ADF will be ejected. Press [Job List] to display the [Job List] screen. For details, see "Types of Screens to Manage Jobs", Convenient Functions.
When placing the original on the exposure glass, press the [
 ] key after all the originals have been scanned.
For details about printing stored documents, see Printing Stored Documents
 .
.For details about setting user name, file name, and password, see Changing Stored Document Information
 .
.
