This section describes the procedure for storing documents on the Document Server.
![]()
A document accessed with a correct password remains selected even after operations are complete, and it can be accessed by other users. After the operation, be sure to press the [Reset] key to cancel the document selection.
The user name registered to a stored document in the Document Server is to identify the document creator and type. It is not to protect confidential documents from others.
When turning on the fax transmission or scanning by the scanner, make sure that all other operations are ended.
File Name
A file name such as "COPY0001" and "COPY0002" is automatically attached to the scanned document. You can change the file name.
User Name
You can register a user name to identify the user or user group that stored the documents. To assign it, select the user name registered in the Address Book, or enter the name directly. Depending on the security setting, [Access Privileges] may appear instead of [User Name]. For details about the Address Book, see "Registering Addresses and Users for Facsimile/Scanner Functions", Connecting the Machine/ System Settings.
Password
To prevent unauthorized printing, you can specify a password for any stored document. A protected document can only be accessed if its password is entered. If a password is specified for the documents, the key icon appears on the left side of the file name.
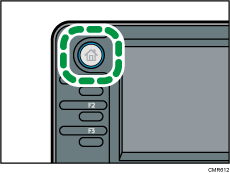
![]() Press the [Home] key on the top left of the control panel, and press the [Document Server] icon on the [Home] screen.
Press the [Home] key on the top left of the control panel, and press the [Document Server] icon on the [Home] screen.

![]() Press [To Scanning Scrn.].
Press [To Scanning Scrn.].
![]() Press [User Name].
Press [User Name].
![]() Specify a user name, and then press [OK].
Specify a user name, and then press [OK].
The user names shown are names that were registered in the Address Book. To specify a name not shown in the screen, press [Manual Entry], and then enter a user name.
![]() Press [File Name].
Press [File Name].
![]() Enter a file name, and then press [OK].
Enter a file name, and then press [OK].
![]() Press [Password].
Press [Password].
![]() Enter a password with the number keys, and then press [OK].
Enter a password with the number keys, and then press [OK].
You can use four to eight digits for the password.
![]() For double-check, enter the password again, and then press [OK].
For double-check, enter the password again, and then press [OK].
![]() Place the original.
Place the original.
![]() Specify the original scanning conditions.
Specify the original scanning conditions.
![]() Press the [Start] key.
Press the [Start] key.
The original is scanned. The document is saved in the Document Server.
After scanning, a list of stored documents will be displayed. If the list does not appear, press [Finish Scanning].
![]()
For details about the keys that appear on the initial Document Server screen, see "How to Use the [Document Server] Screen", Getting Started.
To stop scanning, press the [Stop] key. To restart a paused scanning job, press [Continue] in the confirmation screen. To delete saved images and cancel the job, press [Cancel Scan.]. The original placed in the ADF will be ejected. Press [Job List] to display the [Job List] screen. For details, see "Types of Screens to Manage Jobs", Convenient Functions.
You can omit the user name, file name, and password. A file name is specified automatically if you do not specify one.
You can enter up to 20 characters for a file name. In the list; however, up to 18 characters are displayed as the file name. If above limits are exceeded, the list will display up to 17 characters for the file name.
If the ADF cannot detect the size of an original automatically, the scan will be made at the closest available size.
Data stored in the Document Server is specified to be deleted after three days (72 hours) by the factory default. You can specify the period after which the stored data is deleted automatically under [Auto Delete File in Document Server] in User Tools. For details, see "Administrator Tools", Connecting the Machine/ System Settings.
If you do not want stored documents to be automatically deleted, select [Off] in [Auto Delete File in Document Server] before storing a document. If you select [On] later, data stored after will be automatically deleted. For details, see "Administrator Tools", Connecting the Machine/ System Settings.
You can protect documents by limiting access. For details, see Specifying Access Permission for Stored Documents
 .
.For details about how to enter text, see "Entering Text", Getting Started.
