Setting the Date and Time
This section describes how to set the time and date for the machine's internal clock, and how to select the display format.
Date
Year, month, date, and date format (Month/Day/Year, Day/Month/Year, or Year/Month/Day)
Time
Hour, minute, time format (12- or 24-hour), and AM/PM stamp (when 12-hour time format is selected)
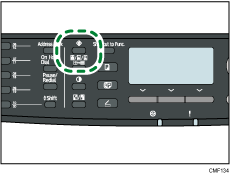
![]() Press the [User Tools] key.
Press the [User Tools] key.

![]() Press the [
Press the [![]() ][
][![]() ] keys to select [Admin. Tools], and then press the [OK] key.
] keys to select [Admin. Tools], and then press the [OK] key.
![]() If you are requested to enter a password, enter the password using the number keys, and then press the [OK] key.
If you are requested to enter a password, enter the password using the number keys, and then press the [OK] key.
![]() Press the [
Press the [![]() ][
][![]() ] keys to select [Set Date/Time], and then press the [OK] key.
] keys to select [Set Date/Time], and then press the [OK] key.
![]() Press the [
Press the [![]() ][
][![]() ] keys to select [Set Date], and then press the [OK] key.
] keys to select [Set Date], and then press the [OK] key.
![]() Press the [
Press the [![]() ][
][![]() ] keys to select the desired date format, and then press the [OK] key.
] keys to select the desired date format, and then press the [OK] key.
![]() Enter the current date using the number keys, and then press the [OK] key.
Enter the current date using the number keys, and then press the [OK] key.
You can press the [![]() ][
][![]() ] keys to move between fields.
] keys to move between fields.
![]() Press the [
Press the [![]() ][
][![]() ] keys to select [Set Time], and then press the [OK] key.
] keys to select [Set Time], and then press the [OK] key.
![]() Press the [
Press the [![]() ][
][![]() ] keys to select the desired time format, and then press the [OK] key.
] keys to select the desired time format, and then press the [OK] key.
![]() Enter the current time using the number keys, and then press the [OK] key.
Enter the current time using the number keys, and then press the [OK] key.
If you selected [12-hour Format], press the [![]() ][
][![]() ] keys to select [AM] or [PM].
] keys to select [AM] or [PM].
You can press the [![]() ][
][![]() ] keys to move between fields.
] keys to move between fields.
![]() Press the [User Tools] key to return to the initial screen.
Press the [User Tools] key to return to the initial screen.
![]()
You can press the [Escape] key to exit to the previous level of the menu tree.
A password for accessing the [Admin. Tools] menu can be specified in [Admin. Tools Lock].
If an incorrect time or date is input, the machine automatically corrects it to the nearest valid time or date.
![]()
For details about [Admin. Tools Lock], see Administrator Settings
 .
.

