Use the bypass tray to use OHP transparencies, adhesive labels, translucent paper, and paper that cannot be loaded in the paper trays.
![]()
The maximum number of sheets you can load at the same time depends on paper type. Do not load paper over the limit mark. For the maximum number of sheets you can load, see Recommended Paper Sizes and Types
 .
.
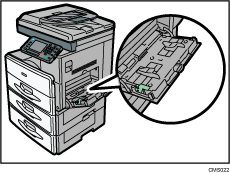
![]() Open the bypass tray.
Open the bypass tray.

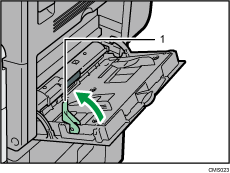
![]() Push up the release lever.
Push up the release lever.

Release lever
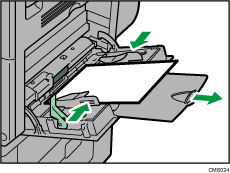
![]() Insert the paper face down.
Insert the paper face down.
![]() Align the paper guides to the paper size.
Align the paper guides to the paper size.
If the guides are not flush against the paper, images might be skewed or paper misfeeds might occur.

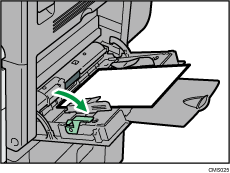
![]() Push down the release lever.
Push down the release lever.
A beeping sound will occur after the paper is inserted and the release lever is pushed down.

![]()
When you use the bypass tray, it is recommended to load the paper in
 orientation.
When copying from the bypass tray, see "Copying from the Bypass Tray", Copy/ Document Server. When printing from a computer, see Settings to Use the Bypass Tray under the Printer Function
 .
.Certain types of paper might not be detected properly when placed on the bypass tray. If this happens, remove the paper and place it on the bypass tray again.
Pull the extender out when loading paper in the bypass tray.
When the [Panel Key Sound] is turned off, it will not sound if you load paper into the bypass tray. For details about [Panel Key Sound], see "System Settings", Connecting the Machine/ System Settings.
When loading thick paper or OHP transparencies, specify the paper size and the paper type.
Letterhead paper must be loaded in a specific orientation. For details, see, Loading Orientation-Fixed Paper or Two-Sided Paper
 .
.You can load envelopes into the bypass tray. Envelopes must be loaded in a specific orientation. For details, see Envelopes
 .
.
