The paper size setting is changed in the same way for each paper tray.
In the following example procedure, the paper size setting for tray 2 is changed.
![]() Check that paper in the paper tray is not being used, and then pull the tray carefully out until it stops.
Check that paper in the paper tray is not being used, and then pull the tray carefully out until it stops.

![]() Remove paper if loaded.
Remove paper if loaded.
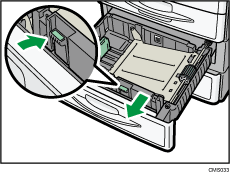
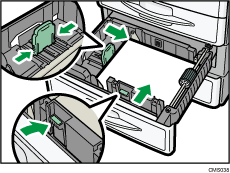
![]() While pressing down the release lever of the side fence, slide the side fence outward.
While pressing down the release lever of the side fence, slide the side fence outward.
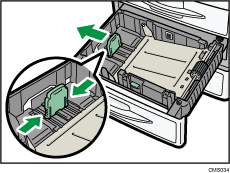
![]() While pinching the release levers of the end fence, slide the end fence outward.
While pinching the release levers of the end fence, slide the end fence outward.
To load 81/4 × 14![]() or 81/2 × 14
or 81/2 × 14![]() size paper, pull the end fence out of the tray and place it in the corner pocket on the left.
size paper, pull the end fence out of the tray and place it in the corner pocket on the left.

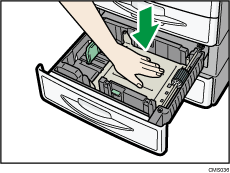
![]() Press the metal plate down until it clicks.
Press the metal plate down until it clicks.
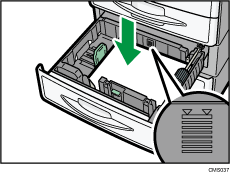
![]() Square the paper and load it print side up.
Square the paper and load it print side up.
Do not stack paper over the limit mark.
![]() Align the back and side fences gently against the paper you loaded.
Align the back and side fences gently against the paper you loaded.
![]() Carefully slide the paper tray fully in.
Carefully slide the paper tray fully in.