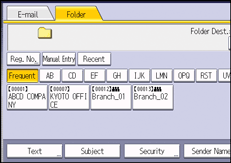
![]() Press [Manual Entry].
Press [Manual Entry].
![]() Press [SMB].
Press [SMB].
![]() Press [Manual Entry] on the right side of the path field.
Press [Manual Entry] on the right side of the path field.
![]() Enter the path for the folder.
Enter the path for the folder.
In the following example path, the shared folder name is "user" and the computer name is "desk01":
\\desk01\user
![]() Press [OK].
Press [OK].
![]() Depending on the destination setting, enter the user name for logging in to the computer.
Depending on the destination setting, enter the user name for logging in to the computer.
Press [Manual Entry] to the right of the user name field to display the soft keyboard.
![]() Depending on the destination setting, enter the password for logging in to the computer.
Depending on the destination setting, enter the password for logging in to the computer.
Press [Manual Entry] for the password to display the soft keyboard.
![]() Press [Connection Test].
Press [Connection Test].
A connection test is performed to check whether the specified shared folder exists.
If the message “Connection with PC has failed. Check the settings.” appears, see "Troubleshooting When Using the Scanner Function", Troubleshooting.
![]() Check the connection test result, and then press [Exit].
Check the connection test result, and then press [Exit].
![]() Press [OK].
Press [OK].
![]()
To change the path for the folder that has been entered, press [Edit] on the left side of the destination field. Enter the correct path for the folder, and then press [OK].
The connection test may take time.
You may not be able to press [Connection Test] right after pressing [Cancel] during a connection test.
Even if the connection test was successful, the machine may fail to transfer the file if you do not have write privileges for the file or there is not enough free hard disk space.
If the client computer has a fixed IP address assigned to it, you can specify the IP address manually by including it in the path name of the destination folder. For example, if the IP address is "192.168.1.191" and the shared folder name is "user", enter "\\192.168.1.191\user" as the path.