Setting the Ethernet Speed
You can set the speed that the printer will use for Ethernet communications. In most cases, this should be left on the default setting, [Auto Select]. This setting allows two interfaces to automatically determine the optimum speed when they are connected.
Router/HUB |
Printer |
||||
|---|---|---|---|---|---|
[10Mbps Half Duplex] |
[10Mbps Full Duplex] |
[100Mbps Half Duplex] |
[100Mbps Full Duplex] |
[Auto Select] |
|
10 Mbps half duplex |
|
- |
- |
- |
|
10 Mbps full duplex |
- |
|
- |
- |
- |
100 Mbps half duplex |
- |
- |
|
- |
|
100 Mbps full duplex |
- |
- |
- |
|
- |
auto-negotiation (auto selection) |
|
- |
|
- |
|
![]()
Connection cannot be established if the selected Ethernet speed does not match your network's transmission speed.
The use of this feature is recommended. To use it, select [Auto Select].
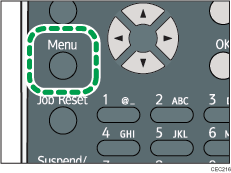
![]() Press the [Menu] key.
Press the [Menu] key.

![]() Press the [
Press the [![]() ] or [
] or [![]() ] key to select [Host Interface], and then press the [OK] key.
] key to select [Host Interface], and then press the [OK] key.

![]() Press the [
Press the [![]() ] or [
] or [![]() ] key to select [Network], and then press the [OK] key.
] key to select [Network], and then press the [OK] key.

![]() Press the [
Press the [![]() ] or [
] or [![]() ] key to select [Ethernet Speed], and then press the [OK] key.
] key to select [Ethernet Speed], and then press the [OK] key.

![]() Press the [
Press the [![]() ] or [
] or [![]() ] key to select the Ethernet speed, and then press the [OK] key.
] key to select the Ethernet speed, and then press the [OK] key.

![]() Press the [Menu] key to return to the initial screen.
Press the [Menu] key to return to the initial screen.
![]() Print a configuration page to confirm the settings.
Print a configuration page to confirm the settings.
![]()
For details about printing the configuration page, see Test Printing.

