


  |  | ||
![]()
|
![]()
|
![]()
|
![]()
|
![]()
|
![]()
|
Messages on the screen
Replace the waste toner bottle when the following message appears on the screen:
“Replace: Waste Toner Bottle”
Prepare a waste toner bottle when the following message appears on the screen:
“Almost Full Waste Toner Bottle”
![]()
Waste toner bottles cannot be reused.
For easy replacement, we recommend you purchase and store extra waste toner bottles.
When removing the waste toner bottle, make sure not to tilt it.
Make sure the transfer unit is installed. If the transfer unit is not installed, install it before turning on the power.
Comply with the waste toner bottle Recycling Program, whereby used waste toner bottles are collected for processing. For details, ask your sales or service representative.
Before removing the waste toner bottle from the machine, spread paper or similar material around the area to keep toner from dirtying your workspace.
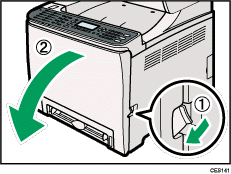
Pull the opening lever on the front cover, and then carefully lower the front cover.
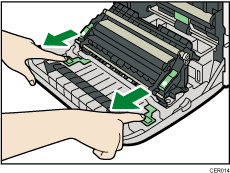
Slide both levers on the front cover forward.
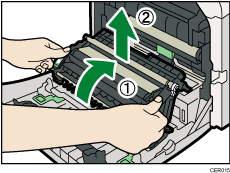
Holding the tabs on both ends of the transfer unit, tilt it backwards then lift it up.
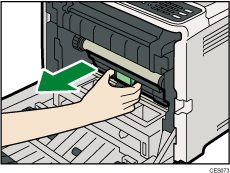
Hold the center of the waste toner bottle, and then carefully pull it partially out without tilting it.
Pull the waste toner bottle halfway out, grab the bottle firmly, and then pull it straight out.
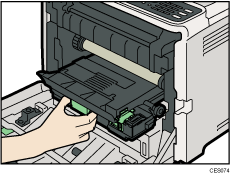
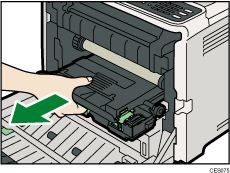
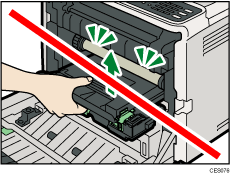
To prevent the waste toner bottle touching the intermediate transfer unit (the position shown by the arrow in the illustration below), do not lift the bottle while pulling it out.
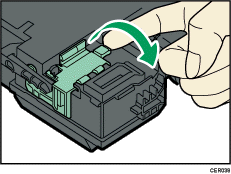
Close the bottle cap.
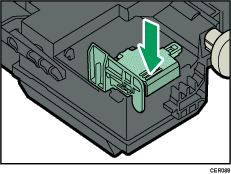
Hold the center of the new waste toner bottle, and then carefully insert it halfway into the machine body.
Leave the bottle cap open.
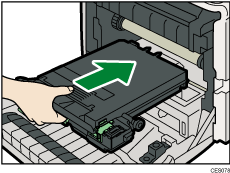
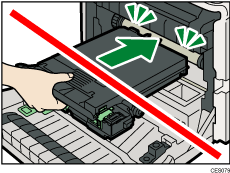
To prevent the waste toner bottle touching the intermediate transfer unit (the position shown by the arrow in the illustration below), do not lift the bottle while inserting it.
Push in the waste toner bottle until it clicks into place.
Push the middle part all the way in.
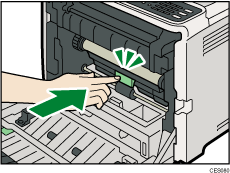
Place the transfer unit down on the front cover.
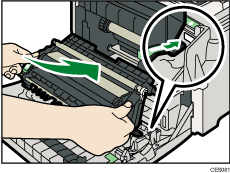
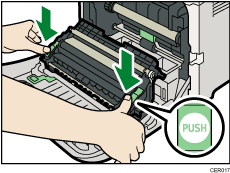
Slide the transfer unit along the guide rails into the machine. When it stops, push on the PUSH mark until it clicks into place.
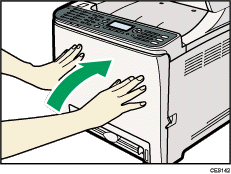
Using both hands, carefully push up the front cover until it closes.
![]()
When closing the front cover, push the upper area of the cover firmly.