Receiving an IP Address for IPv6 Automatically (DHCP)
![]()
When you use this printer in the DHCP environment with IPv6 protocol, select [DHCP] following this procedure.
Consult your network administrator for information about making network settings.
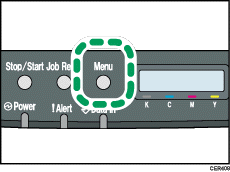
![]() Press the [Menu] key.
Press the [Menu] key.

![]() Press the [
Press the [![]() ] or [
] or [![]() ] key to display [Host Interface], and then press the [OK] key.
] key to display [Host Interface], and then press the [OK] key.
| Menu: Host Interface |
![]() Press the [
Press the [![]() ] or [
] or [![]() ] key to display [Network Setting], and then press the [OK] key.
] key to display [Network Setting], and then press the [OK] key.
| Host Interface: Network Setting |
![]() Press the [
Press the [![]() ] or [
] or [![]() ] key to display [IPv6 Config.], and then press the [OK] key.
] key to display [IPv6 Config.], and then press the [OK] key.
| Network Setting: IPv6 Config. |
![]() Press the [
Press the [![]() ] or [
] or [![]() ] key to display [IPv6], and then press the [OK] key.
] key to display [IPv6], and then press the [OK] key.
| IPv6 Config.: IPv6 |
![]() Press the [
Press the [![]() ] or [
] or [![]() ] key to display [On], and then press the [OK] key.
] key to display [On], and then press the [OK] key.
| IPv6 On |
![]() Press the [
Press the [![]() ] or [
] or [![]() ] key to display [DHCP], and then press the [OK] key.
] key to display [DHCP], and then press the [OK] key.
| IPv6 Config.: DHCP |
![]() Press the [
Press the [![]() ] or [
] or [![]() ] key to select [On], and then press the [OK] key.
] key to select [On], and then press the [OK] key.
| DHCP: On |
The address will be detected by the printer
![]() Press the [Menu] key.
Press the [Menu] key.
![]() If you are requested to restart the printer, turn off the printer, and then turn it back on.
If you are requested to restart the printer, turn off the printer, and then turn it back on.
![]() Print a configuration page to confirm the settings made.
Print a configuration page to confirm the settings made.
![]()
For details about printing the configuration page using control panel, see Test Printing
 .
.

