Adjusting Printing Position
You can adjust the printing position for trays 2-4.
![]() Press the [User Tools/Counter] key.
Press the [User Tools/Counter] key.
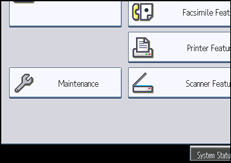
![]() Press [Maintenance].
Press [Maintenance].
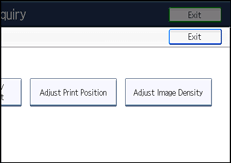
![]() Press [Adjust Print Position].
Press [Adjust Print Position].
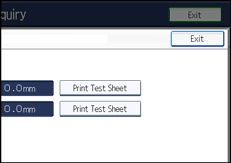
![]() Press [Print Test Sheet].
Press [Print Test Sheet].
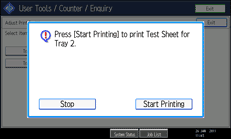
![]() Press [Start Printing].
Press [Start Printing].
![]() Confirm the position of the image on the test sheet, and then adjust the registration value.
Confirm the position of the image on the test sheet, and then adjust the registration value.
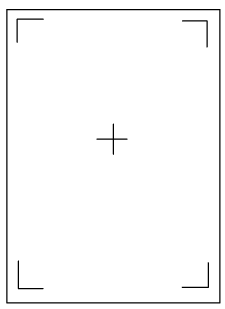
Use this sheet to confirm the current print position.
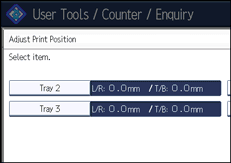
![]() Select the tray you want to adjust.
Select the tray you want to adjust.
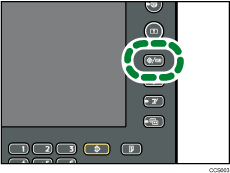
![]() Press [
Press [![]() ] or [
] or [![]() ] to specify the vertical position.
] to specify the vertical position.
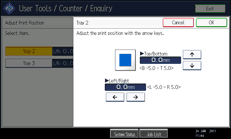
You can specify the printing position between -5.0 mm to 5.0 mm in increments of 0.1 mm.
![]() Press [
Press [![]() ] or [
] or [![]() ] to specify the horizontal position.
] to specify the horizontal position.
![]() Press [OK].
Press [OK].
![]() Print the test sheet to confirm the adjustment result.
Print the test sheet to confirm the adjustment result.
![]() Press [Exit] three times.
Press [Exit] three times.