Loading Paper into Trays 1 - 4
This section describes how to load paper into trays 1 ![]() 4.
4.
Every paper tray is loaded in the same way.
In the following example procedure, paper is loaded in tray 1.
![]()
If a paper tray is pushed vigorously when putting it back into place, the position of the tray's side fences may slip out of place.
During copying or printing, do not open or close the covers or bypass tray, or pull out or push in the paper tray.
![]() Lift and pull tray 1 carefully, and then pull it out with both hands.
Lift and pull tray 1 carefully, and then pull it out with both hands.
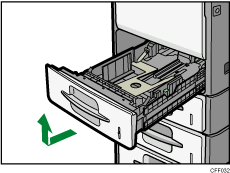
Place the tray on a flat surface.
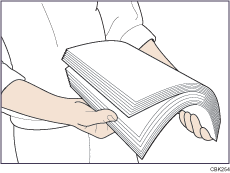
![]() Fan the paper before loading paper in the tray.
Fan the paper before loading paper in the tray.
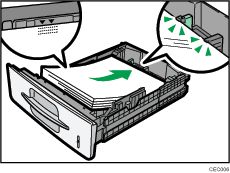
![]() Square the paper and load it print side down.
Square the paper and load it print side down.
Do not stack paper over the limit mark.
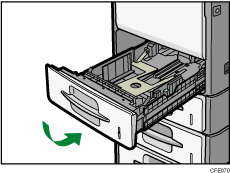
![]() Hold the tray with both hands, slide it along the rails of the machine, and then push it straight in.
Hold the tray with both hands, slide it along the rails of the machine, and then push it straight in.
![]()
Various sizes of paper can be loaded in trays 1
 4 by adjusting the positions of side fences and end fence. For details, see “Changing the Paper Size in Trays 1 4”.
You can load envelopes in trays 1
4. For details about how to load envelopes, see “Changing the Paper Size in Trays 1 4”. For details about various details about and recommendations concerning envelopes, see “Envelopes”.Each tray can hold up to 550 sheets.