Replacing the Fusing Unit
![]()
|
![]() Open the rear cover.
Open the rear cover.
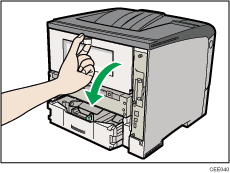
![]() Lower the rear cover until it is horizontal, and then pull it away.
Lower the rear cover until it is horizontal, and then pull it away.
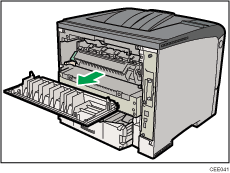
![]() If the optional duplex unit is attached, push down the lever on the right side of the duplex unit (
If the optional duplex unit is attached, push down the lever on the right side of the duplex unit (![]() ), and then pull it out until it stops (
), and then pull it out until it stops (![]() ).
).
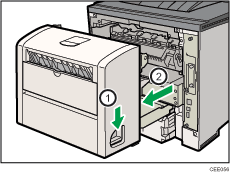
![]() Push the under board levers (
Push the under board levers (![]() ), and then pull the duplex unit out of the printer (
), and then pull the duplex unit out of the printer (![]() ).
).
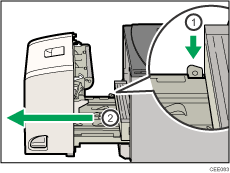
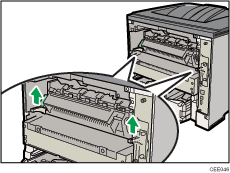
![]() Lift the lock levers of the fusing unit as shown in the illustration.
Lift the lock levers of the fusing unit as shown in the illustration.
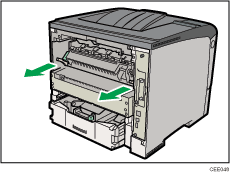
![]() Pull the fusing unit out.
Pull the fusing unit out.
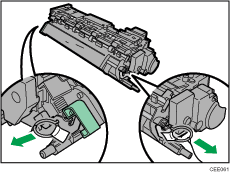
![]() Pull out the pins on both sides of the new fusing unit.
Pull out the pins on both sides of the new fusing unit.
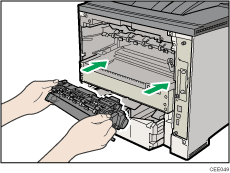
![]() Push the new fusing unit into the printer.
Push the new fusing unit into the printer.
![]() Push the lock levers of the fusing unit down until they click.
Push the lock levers of the fusing unit down until they click.
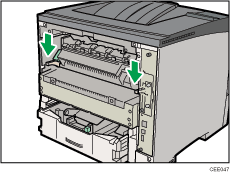
![]() Position the rear cover horizontally and align it with the grooves in the printer's interior.
Position the rear cover horizontally and align it with the grooves in the printer's interior.
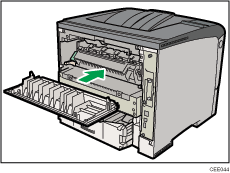
![]() Close the rear cover.
Close the rear cover.
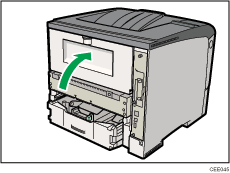
![]() If the optional duplex unit was removed, re-install it in the printer by pushing it along the rails on the inside of the printer.
If the optional duplex unit was removed, re-install it in the printer by pushing it along the rails on the inside of the printer.
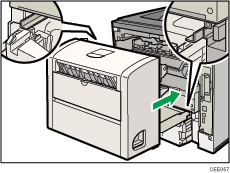
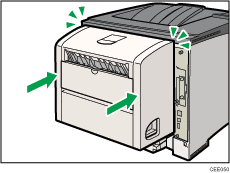
![]() Securely push the duplex unit into the printer.
Securely push the duplex unit into the printer.
![]() Print a configuration page to confirm that the printer works properly.
Print a configuration page to confirm that the printer works properly.
![]()
For details on printing the configuration page, see Test Printing
 .
.

