Replacing the Transfer Roller
![]()
Do not insert the roller on the back of the socket. Doing so can damage the printer.
Insert the metallic part of the roller on the socket. If you insert the sponge part of the roller, the roller might be damaged.
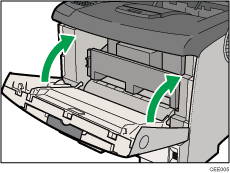
![]() Open the front cover by pushing the front cover release button.
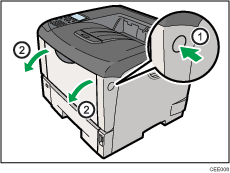
Open the front cover by pushing the front cover release button.
![]() Pull the print cartridge out of the printer by holding the grips of the cartridge.
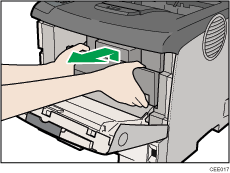
Pull the print cartridge out of the printer by holding the grips of the cartridge.
![]() To avoid dirtying your hands with toner from the transfer roller, wear the gloves included in the Maintenance Kit.
To avoid dirtying your hands with toner from the transfer roller, wear the gloves included in the Maintenance Kit.
![]() Hold the lock levers, and then pull them.
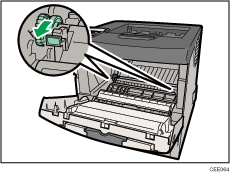
Hold the lock levers, and then pull them.
![]() Hold the green parts of the roller on both sides, and remove the roller from the printer, as shown in the illustration.
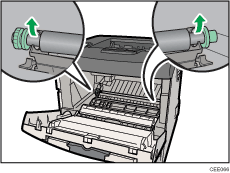
Hold the green parts of the roller on both sides, and remove the roller from the printer, as shown in the illustration.
![]() Insert the new transfer roller on the socket with the gear of the roller positioned to the left.
Insert the new transfer roller on the socket with the gear of the roller positioned to the left.
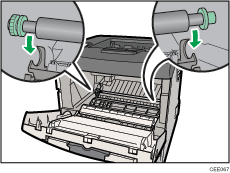
![]() Push down the lock levers on both ends of the printer as shown in the illustration, until they click into place.
Push down the lock levers on both ends of the printer as shown in the illustration, until they click into place.
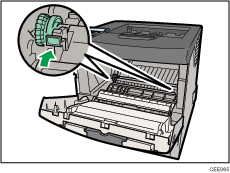
![]() Take the gloves off.
Take the gloves off.
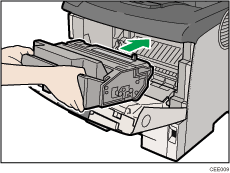
![]() Hold the grips of the print cartridge, and then insert it into the printer until it stops.
Hold the grips of the print cartridge, and then insert it into the printer until it stops.
![]() Push down the print cartridge to secure it in the appropriate position.
Push down the print cartridge to secure it in the appropriate position.
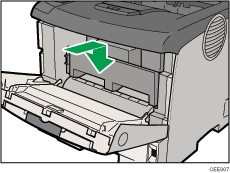
![]() Close the front cover.
Close the front cover.
![]()
Be sure to place the used cartridge on a level surface.
When the transfer roller is set, the transfer roller cover will return to its original position automatically.

