Specifying an IP Address (No DHCP)
Follow this procedure to assign a specific IP address to the printer. This is only necessary when you will use the printer on a network without DHCP, or want to prevent the printer's IP address from changing.
Before beginning, make sure that you know the IP address, subnet mask and gateway address that the printer will use.
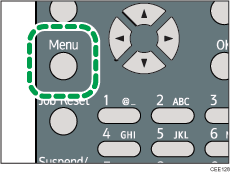
![]() Press the [Menu] key.
Press the [Menu] key.

![]() Press the [
Press the [![]() ] or [
] or [![]() ] key to select [Host Interface], and then press the [OK] key.
] key to select [Host Interface], and then press the [OK] key.

![]() Press the [
Press the [![]() ] or [
] or [![]() ] key to select [Network], and then press the [OK] key.
] key to select [Network], and then press the [OK] key.

![]() Press the [
Press the [![]() ] or [
] or [![]() ] key to select [Effective Protocol], and then press the [OK] key.
] key to select [Effective Protocol], and then press the [OK] key.

![]() Press the [
Press the [![]() ] or [
] or [![]() ] key to select the appropriate network protocol, and then press the [OK] key.
] key to select the appropriate network protocol, and then press the [OK] key.

![]() Press the [
Press the [![]() ] or [
] or [![]() ] key to select [Active] or [Inactive], and then press the [OK] key.
] key to select [Active] or [Inactive], and then press the [OK] key.

Set other protocols you need to set in the same way.
Select [Inactive] for unused protocols.
Enable IPv4 to use the pure IPv4 environment of NetWare5/5.1, NetWare 6/6.5.
![]() Press the [Escape] key until the screen returns to the [Network] menu.
Press the [Escape] key until the screen returns to the [Network] menu.
![]() If you use IPv4, assign the IPv4 address to the printer. Press the [
If you use IPv4, assign the IPv4 address to the printer. Press the [![]() ] or [
] or [![]() ] key to select [Machine IPv4 Address], and then press the [OK] key.
] key to select [Machine IPv4 Address], and then press the [OK] key.

To get the IP address for the printer, consult your network administrator.
![]() To specify the IP Address, press [IP Add.].
To specify the IP Address, press [IP Add.].

If you use IPv4, also assign the subnet mask and gateway address. To assign these, press [Subnet M] or [Gateway].
![]() Enter the address, and then press the [OK] key.
Enter the address, and then press the [OK] key.
Change the IP address from "11.22.33.44" to an IP address supported by your network.

![]() Use the same method to assign the subnet mask and gateway address.
Use the same method to assign the subnet mask and gateway address.
![]() Press the [
Press the [![]() ] or [
] or [![]() ] key to select [Specify], and then press the [OK] key.
] key to select [Specify], and then press the [OK] key.

![]() Press the [Menu] key to return to the initial screen.
Press the [Menu] key to return to the initial screen.
![]() Print a configuration page to confirm the settings.
Print a configuration page to confirm the settings.
![]()
For details about printing the configuration page, see Test Printing
 .
.

