Printing Stored Documents
Web Image Monitor allows you to print documents stored in the Document Server from your computer.
![]() Select a document to be printed.
Select a document to be printed.
If a password is set, enter it, and then press [OK].
![]() When printing two or more documents at a time, repeat step 1.
When printing two or more documents at a time, repeat step 1.
Up to 30 documents can be printed.
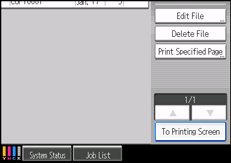
![]() When specifying printing conditions, press [To Printing Screen].
When specifying printing conditions, press [To Printing Screen].

The printing condition screen will appear. The user name, file name, and printing order of the document will be displayed.
![]() Enter the number of print copies with the number keys.
Enter the number of print copies with the number keys.
The maximum quantity that can be set is 9999.
![]() Press the [Start] key.
Press the [Start] key.
![]()
You can search the target document using [User Name] or [File Name] situated in the left side of the screen.
You can sort the documents by user name, file name, or creation date. Press the item to be used for the sorting on the top of the list.
Some of the selected documents may not be printed due to the difference in the size or resolution.
When changing the printing order, cancel the highlight and then specify the order correctly.
Pressing the [Clear Modes] key cancels every selection.
Pressing [Order] displays the selected documents in the printing order.
The copy and printer features hold the specified printing conditions after the operation is over and apply them at the next printing.
When two or more documents are specified, the printing conditions are stored on the first document but not on the succeeding documents.
Following settings are available for the printing conditions. For respective printing results, see “Basic Copying” and “Advanced Copying”.
Paper tray
The number of prints
2 Sided / Book (1-sided printing, 2-sided printing, Specify Duplex Pages, Booklet, Magazine)
Edit (Margin Adj., 3 Edges Full Bleed, Double Copies, Centering/ Cornering)
Cover/ Slip Sheet (Front Cover, Back Cover, Designate / Chapter, Slip Sheet)
Sort / Stack
Output/ Finisher (Output, Finisher, Fold)
Stamp (Preset Stamp, User Stamp, Date Stamp, Page Numbering, Stamp Text)
Using the Cornering function, you can move the print image to the corner or center of the copy paper.
When printing two or more copies while selecting the sort function, you can confirm the finish by printing only one copy.
When printing two or more documents at a time, you can print them as a single continuous document by specifying the order of their printing.
When printing two or more documents at a time, the printing conditions set for the first document are applied to all the remaining documents.
When two or more documents are selected, press [
 ] [
] [ ] to confirm the user name, document name and printing order of the document.
Pressing [File List] restores the document selection screen.
You can change the maximum print quantity under Max. Copy Quantity in User Tools. For details about Max. Copy Quantity, see General Features
 .
.Web Image Monitor allows you to print a document stored in the Document Server from your computer. For the Web Image Monitor starting procedure, see Displaying Stored Documents with Web Image Monitor
 .
.

