Two-Sided Combine
Combines various pages of originals onto two sides of one sheet.
![]()
You cannot use the bypass tray with this function.
There are four types of Two-Sided Combine.
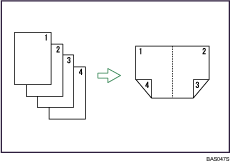
1 Sided 4 Pages ![]() Combine 2 Sides
Combine 2 Sides
Copies four 1-sided originals to one sheet with two pages per side.
1 Sided 8 Pages ![]() Combine 2 Sides
Combine 2 Sides
Copies eight 1-sided originals to one sheet with four pages per side.
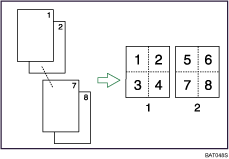
Front
Back
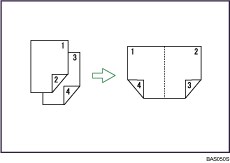
2 Sided 2 Pages ![]() Combine 2 Sides
Combine 2 Sides
Copies two 2-sided originals to one sheet with two pages per side.
2 Sided 4 Pages ![]() Combine 2 Sides
Combine 2 Sides
Copies four 2-sided originals to one sheet with four pages per side.
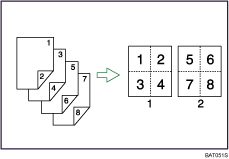
Front
Back
![]() Press the [Combine/Series] key.
Press the [Combine/Series] key.
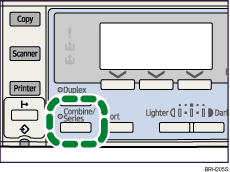
The indicator goes on.
![]() Select the combine mode using [
Select the combine mode using [![]() ] or [
] or [![]() ], and then press the [OK] key.
], and then press the [OK] key.

![]() Select the original orientation using [
Select the original orientation using [![]() ] or [
] or [![]() ], and then press the [OK] key.
], and then press the [OK] key.

![]() Select the duplex orientation using [
Select the duplex orientation using [![]() ] or [
] or [![]() ], and then press the [OK] key.
], and then press the [OK] key.

The “Programmed” message appears.
![]() Select the paper size using [
Select the paper size using [![]() ] or [
] or [![]() ], and then press the [OK] key.
], and then press the [OK] key.

![]() Place the originals, and then press the [Start] key.
Place the originals, and then press the [Start] key.
![]()
To cancel the Two-Sided Combine function in step 1, press the [Combine/Series] key again. Make sure the indicator goes off.
If you set a binding margin that is too wide, parts of the image may not be copied.
When making copies using the Combine function, a binding margin is added to copies after the images are combined.
To display the screens in steps 3 and 4, select [Always Specify] for [Orientation] with Copier Features in User Tools. If [Do not Specify] is selected, proceed to step 5. For details about Orientation, see “User Tools Menu”.

