


  |  | ||
This section describes how to change the paper size in trays 2 ![]() 4.
4.
The paper size setting is changed in the same way for every paper tray.
In the following example procedure, the paper size setting for tray 2 is changed.
![]()
If a paper tray is pushed vigorously when putting it back into place, the position of the tray's side fences may slip out of place.
Check the paper edges are aligned at the right side.
Slide the side fences until they are aligned with the paper size, and then re-lock the side fences.
Various sizes of paper can be loaded in trays 2 ![]() 4 by adjusting the positions of the side fences and end fence.
4 by adjusting the positions of the side fences and end fence.
Check that paper in the paper tray is not being used, and then pull the tray carefully out until it stops.
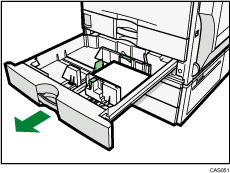
Remove paper if loaded.
Release the lock on the side fences.
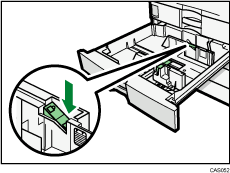
While pressing down the release lever, slide the side fences outward.
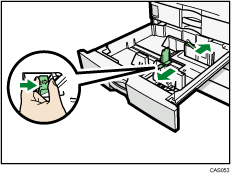
Slide the end fence outward.
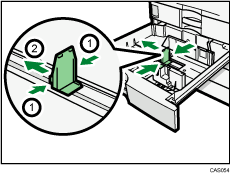
Pinch the release levers of the end fence.
Slide the end fence outward.
Square the paper and load it print side up.
Do not stack paper over the limit mark.
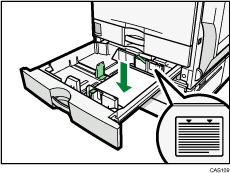
Align the back and side fences gently against the paper you loaded.
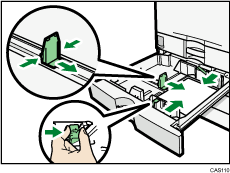
Re-lock the side fences.
Carefully slide the paper tray fully in.
Check the paper size on the display.
![]()
You can load envelopes in trays 2 ![]() 4. Be sure to open out their flaps and set them in the
4. Be sure to open out their flaps and set them in the ![]() orientation.
orientation.
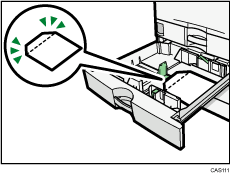
For details about various details about and recommendations concerning envelopes, see “Envelopes”.
If you load a paper size that is not selected automatically, you will need to specify the paper size with the control panel. For details, see “Changing to a Size That Is Not Automatically Detected”.