
| |||
This section introduces the names and functions of the components of type 3 and 4.
![]()
Do not obstruct the ventilation holes by placing objects near them or leaning things against them. If the machine overheats, a fault might occur.
Front and left view
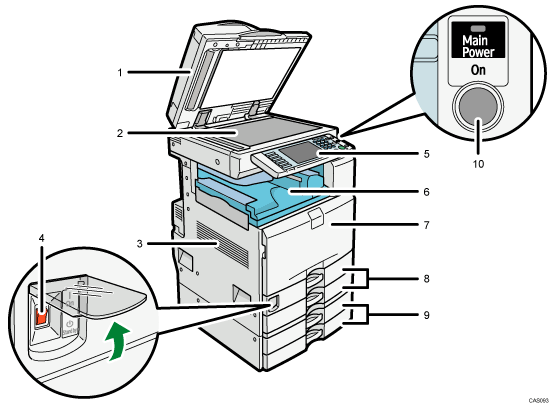
ARDF or one-pass duplex scanning ADF
(The illustration shows the ARDF.)
Lower the ADF over originals placed on the exposure glass.
If you load a stack of originals in the ADF, the ADF will automatically feed the originals one by one.
The ARDF scans both sides of an original one side at a time.
The one-pass duplex scanning ADF scans both sides of an original simultaneously.
Exposure glass
Place originals face down here.
Ventilation holes
Prevent overheating.
Main power switch
If the machine does not operate after turning on the operation switch, check if the main power switch is turned on. If it is off, turn it on. See Turning On/Off the Power.
Control panel
See Control Panel.
Internal tray 1
Copied/printed paper and fax messages are delivered here.
Front cover
Open to access the inside of the machine.
Paper trays (trays 1 ![]() 2)
2)
Load paper here.
Lower paper trays (optional)
Load paper here.
Operation switch
Press to turn the power on (the operation switch indicator lights up). To turn the power off, press again (the operation switch indicator goes off). See Turning On/Off the Power.
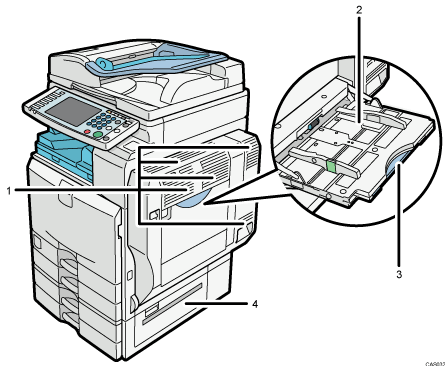
Front and right view
Ventilation holes
Prevent overheating.
Bypass tray
Use to copy or print on OHP transparencies, label paper (adhesive labels), envelopes and custom size paper.
Extender
Pull this extender out when loading sheets larger than A4![]() in the bypass tray.
in the bypass tray.
Lower right cover
Open this cover when a paper jam occurs.
Rear and left view
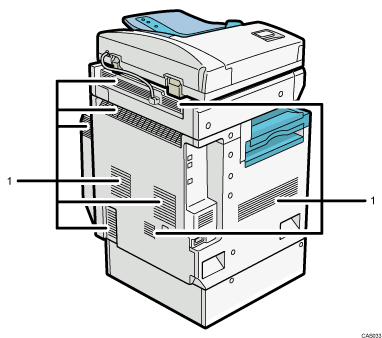
Ventilation holes
Prevent overheating.
![]()
To cool the machine's interior, the fan may continue running after the machine finishes a large print job. For details, see When You Have Problems Operating the Machine, Troubleshooting![]()
![]() .
.
| Copyright (C) 2010 |