
| |||
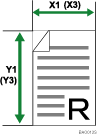
To scan the entire area of an original, specify its width and length under Original Size (X1 and Y1) and Scan Area (X3 and Y3).
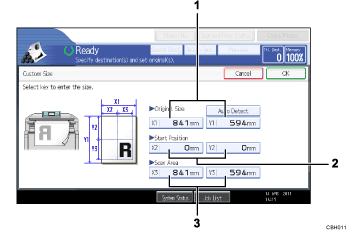
To display the custom size setting screen, on the initial scanner screen, press [Scan Settings] > [Scan Size] > [Custom Size].
Custom size original to be scanned
Scan settings on the custom size setting screen
Original Size (X1 and Y1)
Specify the length and width of the original.
Enter the actual width and length in [X1] and [Y1], respectively, and then press the [![]() ] key.
] key.
Start Position (X2 and Y2)
Set Start Position to 0 mm (0 inch).
Enter "0" in both [X2] and [Y2], and then press the [![]() ] key.
] key.
Scan Area (X3 and Y3)
Specify the same values as Original Size (X1, Y1).
Enter the same values in [X3] and [Y3] as Original Size (X1 and Y1 respectively), and then press the [![]() ] key.
] key.
| Copyright (C) 2010 |