Skip headerGelSprinter GX e2600/GX e3300N/GX e3350N/GX e7700N
ContentsPreviousNextHelp

Plugging in the Power Cord and Turning the Power On

Before connecting the printer to a computer, connect the printer's power cord and switch the printer on.

WARNING


  • Do not use any power sources other than those that match the specifications shown in this manual. Doing so could result in fire or electric shock.

WARNING


  • Do not use multi-socket adaptors. Doing so could result in fire or electric shock.

WARNING


  • Do not use extension cords. Doing so could result in fire or electric shock.

WARNING


  • Do not use power cords that are damaged, broken, or modified. Also, do not use power cords that have been trapped under heavy objects, pulled hard, or bent severely. Doing so could result in fire or electric shock.

WARNING


  • Touching the prongs of the power cable's plug with anything metallic constitutes a fire and electric shock hazard.

WARNING


  • The supplied power cord is for use with this machine only. Do not use it with other appliances. Doing so could result in fire or electric shock.

WARNING


  • It is dangerous to handle the power cord plug with wet hands. Doing so could result in electric shock.

WARNING


  • If the power cord is damaged and its inner wires are exposed or broken, contact your service representative for a replacement. Use of damaged power cords could result in fire or electric shock.

WARNING


  • Be sure to locate the machine as close as possible to a wall outlet. This will allow easy disconnection of the power cord in the event of an emergency.

CAUTION


  • Be sure to push the plug of the power cord fully into the wall outlet. Partially inserted plugs create an unstable connection that can result in unsafe buildup of heat.

CAUTION


  • When disconnecting the power cord from the wall outlet, always pull the plug, not the cord. Pulling the cord can damage the power cord. Use of damaged power cords could result in fire or electric shock.

Important

  1. Plug the power cord fully into the printer.
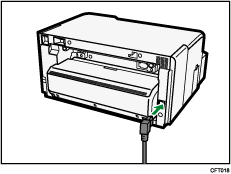
    power cord illustration

  2. Plug the power cord fully into the wall outlet.
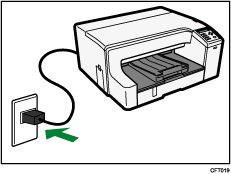
    power cord illustration

    The surface should be level within two degrees.

    Make sure the power cord is not trapped under the printer.

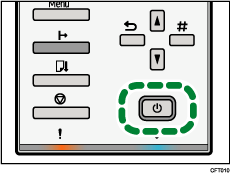
  3. Press the [Power] key.

    Power key illustration

    The printer starts feeding ink into its print heads (taking approximately 6 minutes).

    Make sure the "Ready" message is displayed on the control panel.

    Do not switch off the power of the machine during this period. Make sure the plug is not removed from the wall outlet.

    You might hear a clicking sound while the print heads are filling. This is not a malfunction. It will stop after a while.