

  |  | ||
Select a user that you want to specify as a sender.
If the sender's e-mail address is registered in the destination list, the sender can receive transmission results by e-mail.
Also, if you enable the Stamp Sender Name, the registered sender's name (user name) appears on the receiver's sheet, lists, and report.
![]()
You must first register the senders in the destination list using "Address Book Management" in "System Settings" to specify their e-mail addresses, and then specify "Use Name as" for [Sender]. If you want senders to receive e-mail notification of transmission results, specify "Use Name as" for both [Sender] and [Destination]. For details about these settings, see "Registering Addresses and Users for Facsimile/Scanner Functions", General Settings Guide.
If user authentication is set, the user logged in is set as sender. The transmission result is sent to the logged-in user's e-mail address.
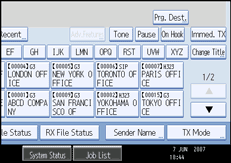
Place the original, and then select the scan settings you require.
Press [Sender Name].

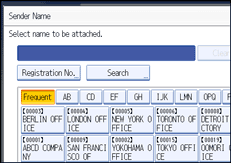
Select a sender.

To select a sender by specifying the registration number registered in the Address Book, press [Registration No.].
To search for a sender from the Address Book, press [Search].
If a destination protection code is set, the entry screen appears. Enter the protection code for destination using the number keys, and then press [OK].
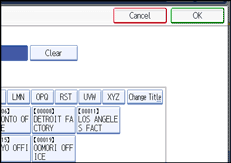
Confirm the selected sender, and then press [OK].

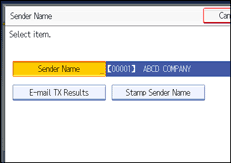
To print the sender's name on the receiver's sheet, press [Stamp Sender Name] to highlight it.
If you enable this function, the sender's name (user name) appears on the receiver's sheet, lists, and report.

To confirm the transmission results by e-mail notification, press [E-mail TX Results] to highlight it.
If the sender's e-mail address is registered, you can send the transmission result to the registered e-mail address.

Press [OK].
The standby display appears.
To check the settings, press [Sender Name].
Specify the destination, and then press the [Start] key.
![]()
You can confirm transmission results by using both the E-mail TX Results function, which sends the results by e-mail, and the Communication Result Report printed by the machine. You can set whether to use both of these together in User Parameter (switch 10, bit 6) in the Facsimile Features menu. See "Facsimile Features", General Settings Guide.
You can use Communication Result Report, etc. to check usage status by specified users. If user authentication is set, you can check usage by logged-in users. If User Code is set to sender, you can count the number of uses by each user.
To cancel the Sender Name, cancel the transmission. See "Canceling a Transmission".