
| |||
This section describes how to load tab stock into trays.
![]()
Before using this function, set the tray for tab stock and set the position of the index tab under Paper Type in Tray Paper Settings. For details about Paper Type, see "Tray Paper Settings", General Settings Guide.
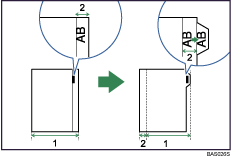
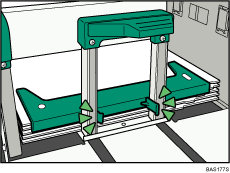
1. Original width
2. Index width
Specify the size of tab stock under Paper Size in Tray Paper Settings. The sizes that can be used are A4![]() , 81/2" × 11"
, 81/2" × 11"![]() , and 81/2" × 14"
, and 81/2" × 14"![]() . For details about Paper Size, see "Tray Paper Settings", General Settings Guide.
. For details about Paper Size, see "Tray Paper Settings", General Settings Guide.
Tab stock can be loaded into Tray 2, Large Capacity Tray, Wide Large Capacity Tray and multi bypass tray.
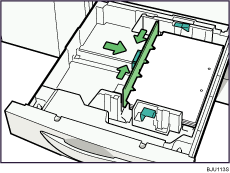
Set tab stock so that the side with the tab is facing the back fence.
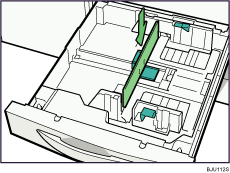
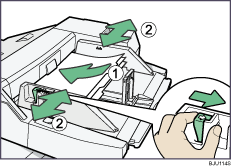
When loading tab stock in the paper trays, always use the tab sheet holder on each tray. The tab sheet holder for Tray 2 is an optional unit.
Tray 2
Adjust the end fence position so that the tab sheet holder will fit the tab stock.
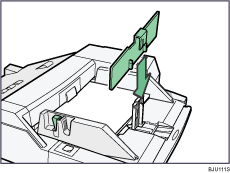
Large Capacity Tray
Place the tab sheet holder on the loaded tab stock.
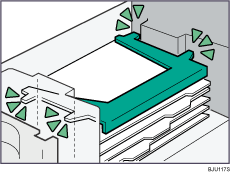
Wide Large Capacity Tray
Place the tab sheet holder on the loaded tab stock.
Multi Bypass Tray
Adjust the end fence position so that the tab sheet holder will fit the tab stock.
![]()
Check the position of the index tab to avoid cropping the image.
Align the image you want to print by checking the position of the index tab. If the image extends beyond the index tab, the backs of sheets may get soiled with toner.
Tab stock is fed starting from the top tab.
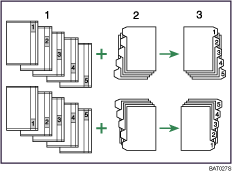
1. Originals
2. Tab Stock
3. Printed
When a paper jam has occurred, check the order of originals and tab stock, and then restart printing.
| Copyright (C) 2008, 2009 |