Loading Paper in the Interposer
This section describes how to load paper into the interposer.
![]()
Load paper on the side already printed (the front side). If you are using the Booklet Finisher SR5020, load sheets print side down.
Load paper in the interposer in the same orientation as paper in the paper tray.
The staple or punching location will be on the left side of the paper, when you are facing the machine.
Do not place anything on top of or leave documents on the sensor. This may lead to the paper size not being correctly scanned or paper jams.
When using the folding functions, the paper in the interposer must be of the same size as the prints after they have been folded. If the paper in the interposer is larger than the folded sheets, a misfeed might occur.
Do not stack paper over the limit mark.
Do not use paper that has already been printed onto by this machine.
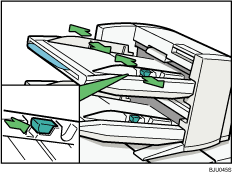
![]() While pressing the release lever, align the side fences with the paper size to be loaded.
While pressing the release lever, align the side fences with the paper size to be loaded.

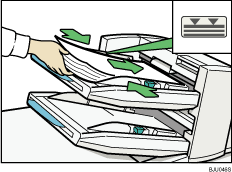
![]() Load paper orderly. Tightly fit the side fences to the loaded paper.
Load paper orderly. Tightly fit the side fences to the loaded paper.

When loading paper larger than A4, draw out the paper extender.
![]()
Each tray can hold up to 200 sheets of paper.
If you load a paper size that is not selected automatically, you will need to specify the paper size with the control panel.
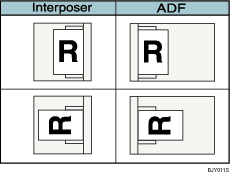
To set the paper in the interposer, align the orientation of originals in the ADF as shown below.


