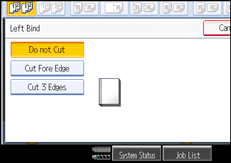
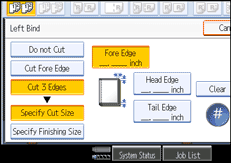
Specify the position of the cut
Specify the position of the cut for each edge.
![]() Press [Cut 3 Edges].
Press [Cut 3 Edges].

![]() Make sure that [Specify Cut Size] is selected.
Make sure that [Specify Cut Size] is selected.
![]() Enter the position of the cut for each edge using the number keys, and then press [
Enter the position of the cut for each edge using the number keys, and then press [![]() ].
].

Press [Head Edge], and then enter the cut position for the head edge using the number keys.
Press [Tail Edge], and then enter the cut position for the tail edge using the number keys.
To change the value you entered, press [Clear] and then enter a new value.
![]() Press [OK] twice.
Press [OK] twice.
![]()
You can adjust the position of the fore edge cut from 6 to 50 mm (0.24 to 1.96 inches) in 0.1 mm (0.01 inch) increments.
You can shift the position of the head and tail edge cuts from 6 to 28 mm (0.24 to 1.10 inches) in 0.1 mm (0.01 inch) increments.

