

  |  | ||
Follow the procedure below to perform a normal print head cleaning. Perform a head cleaning when a particular color cannot be printed or print images are blurred. Head cleaning consumes ink.
When the Print cartridge is empty, replace it instead of performing a print head cleaning. After a Print cartridge is replaced, a print head cleaning will be automatically performed.
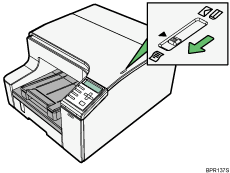
Slide the envelope selector ![]() to the forward position.
to the forward position.

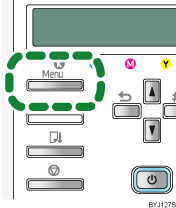
Press the [Menu] key.

Press the [![]() ] or [
] or [![]() ] key to display [Maintenance], and then press the [#Enter] key.
] key to display [Maintenance], and then press the [#Enter] key.
| Menu: Maintenance |
Press the [![]() ] or [
] or [![]() ] key to display [Head-cleaning], and then press the [#Enter] key.
] key to display [Head-cleaning], and then press the [#Enter] key.
| Maintenance: Head-cleaning |
Press the [![]() ] or [
] or [![]() ] key to select a color, and then press the [#Enter] key.
] key to select a color, and then press the [#Enter] key.
| Head-cleaning: All Heads |

1. Head 1 (Yellow/Magenta)
2. Head 2 (Black/Cyan)
Press the [#Enter] key.
| Press # to clean heads |
Head cleaning starts.
| Maintenance in process... |
Press the [Online] key.
The initial screen appears.