Removing Paper Jammed under the Top Cover
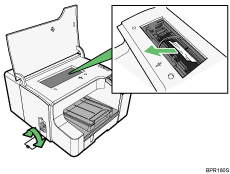
Follow the procedure below to remove paper jammed under the top cover.
![]()
If the printer's ink tube is preventing access to the jammed paper, carefully pull the tube to the side. Do not pull the tube upward. Pulling the tube upward will damage the printer.
Do not touch the feed belt, the transparent black band, print head rail rod, ink tubes, paper pressing board, or toothed rubber belt. Also, take care not to snag any cables or ink tubes with your sleeves.
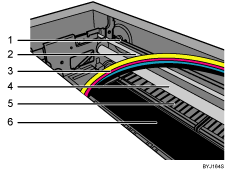
Toothed rubber belt
Transparent black band
Ink tubes
Print Head Rail Rod
Paper pressing board
Feed belt
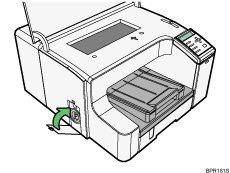
You can feed the jammed paper to output ramp by opening the left cover and turning the paper feed wheel.
If turning the paper wheel does not remove the jammed paper, use the following procedure to remove it:
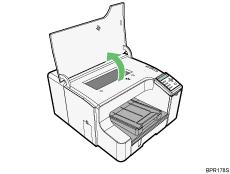
Open the top cover.
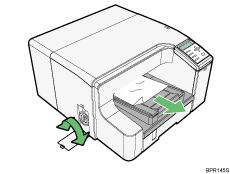
Open the left cover, and then turn the paper feed wheel.
Turn the wheel while looking for the jammed paper through the top cover opening.
Remove the jammed paper through the top cover opening.
If the carriage has stopped halfway, move it to either end.
Close the left cover.
Close the top cover.
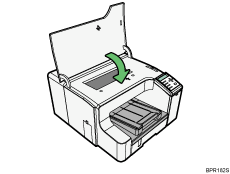
Printing starts.
After completing this procedure, print the nozzle check test pattern to make sure the print head's nozzles are not clogged.
![]()
Before starting a print job, be sure to attach the output ramp.
Align the paper and reload it in the paper tray. Loading paper over the limit line in the tray may result in a paper jam.
